
In this article
Step 1: Unbox your Zebra Printer
Step 3: Load thermal transfer ribbon
Step 4: Review the Zebra printer buttons and indicator lights
Step 6: Download and install the Sowingo app
Step 7: Check the Printer Settings
Step 9: Unbox and setup scanners
Before you begin
- Please ensure you’re in a location that has a good, reliable WIFI connection.
- Get the name of the WIFI (ESSID) that your computer and mobile devices are using.
- Confirm that WPA PSK is the security mode for your WIFI. If you’re unsure, reach out to your IT team for assistance.
- Have the password for that WIFI ready as well (you’ll need this to connect the printer to your WIFI network)
Step 1: Unbox your Zebra Printer
- Open the box of your new Zebra Label Printer
- Check to make sure that all of the following components are included: Label Printer, USB cable, power cable, power cable extension, cardboard spool, and instruction manual.

Step 2: Load label roll
- Open the Zebra printer head by sliding both yellow release latches forward and lift the top of the printer head up.

- Remove and discard labels loaded in the machine.

- Remove the sticker on the end of the new media roll to unravel it slightly. Pry the yellow label holders open and place the label roll so it sets in the center of the spool. It should now spin freely.

- Then, pull the end of the roll out past the front edge of the printer, until 1 label is sticking out the front of the printer. Be sure the labels are tucked underneath the yellow guide seen in the picture below.

- Now, lift up the end of the labels and make sure the center of the roll is aligned to the yellow sensor underneath (by default it should already be aligned).

- Once those steps have been completed, you’re ready to move onto Step 3.
Step 3: Load thermal transfer ribbon
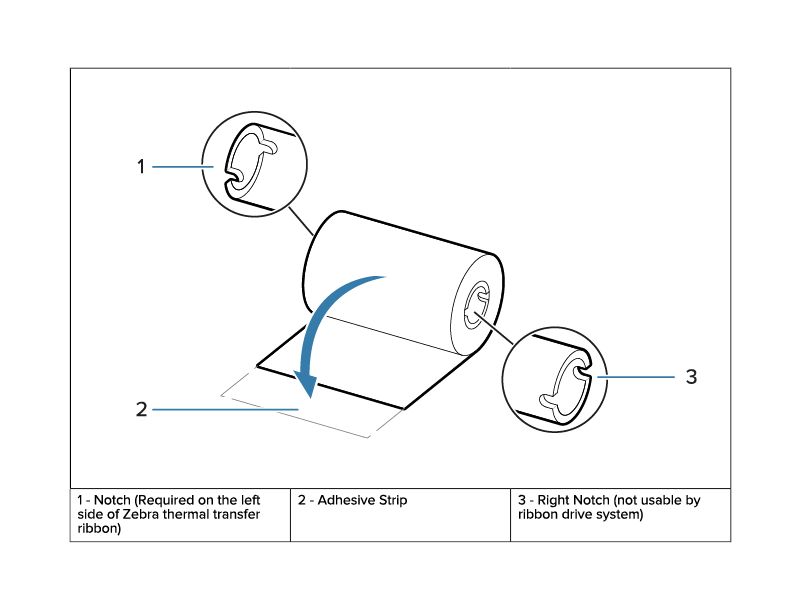
- Take the cardboard spool and load it into the top part of the spring-loaded spindle, aligning it with the notches (it should lock into place). Then, do the same with the thermal transfer ribbon in the spot shown below, ensuring the ribbon spool is properly secured.

- While installed, pull the thermal transfer ribbon clear adhesive towards you, then up and over the printhead and attach the adhesive to the cardboard spool and ensure the adhesive is secured to it.
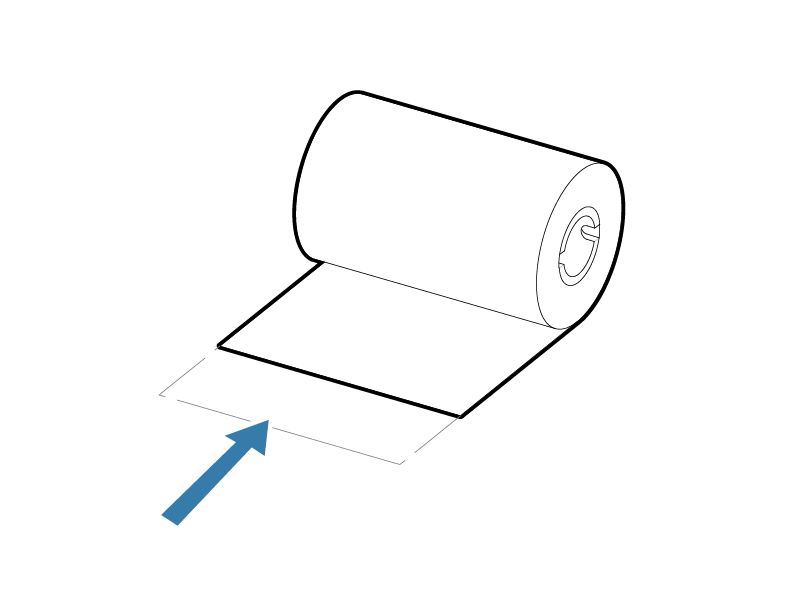
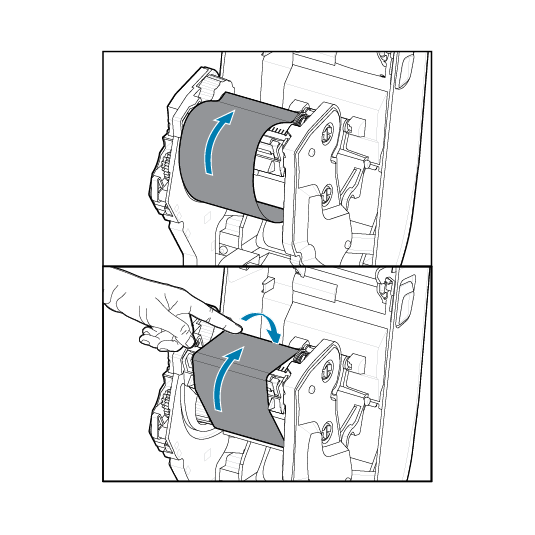
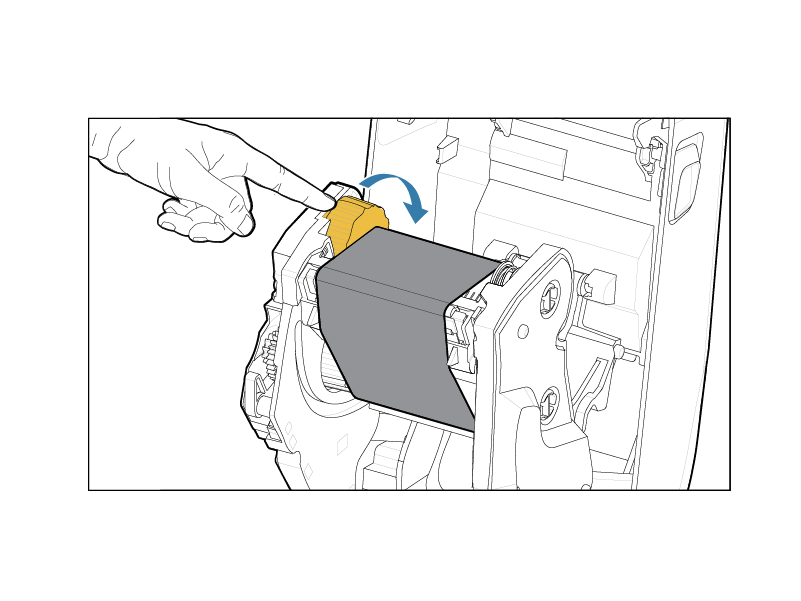
- On the left side of the printer, turn the yellow ribbon wheel forward to advance the ribbon until all you see is black.
Step 4: Review the Zebra printer buttons and indicator lights

Step 5: Turn on Zebra printer
- Plug the power supply cable into the power supply box, then plug the power supply box cable into the back of the printer. Now, plug the power cord into the power outlet. On the power supply box, the power supply light should turn green.

- Power the Zebra printer on by pressing the power button. All indicator lights should go amber, then begin to adjust until the Status Indicator light turns green, and the Network Indicator light turns red.

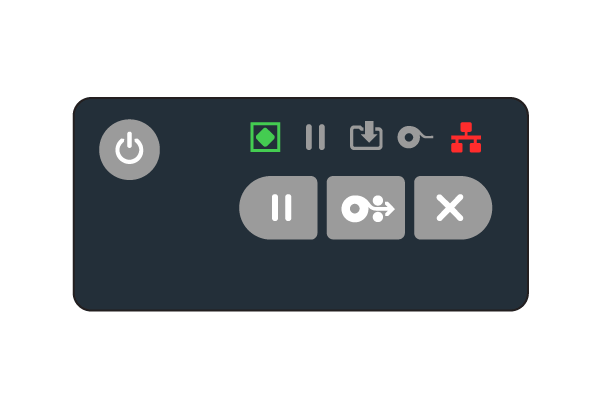
- Next, we need to connect the printer to your local WIFI. Please continue to Step 6 to follow those steps.
Step 6: Download the Sowingo iOS app
Please Download the Sowingo app.
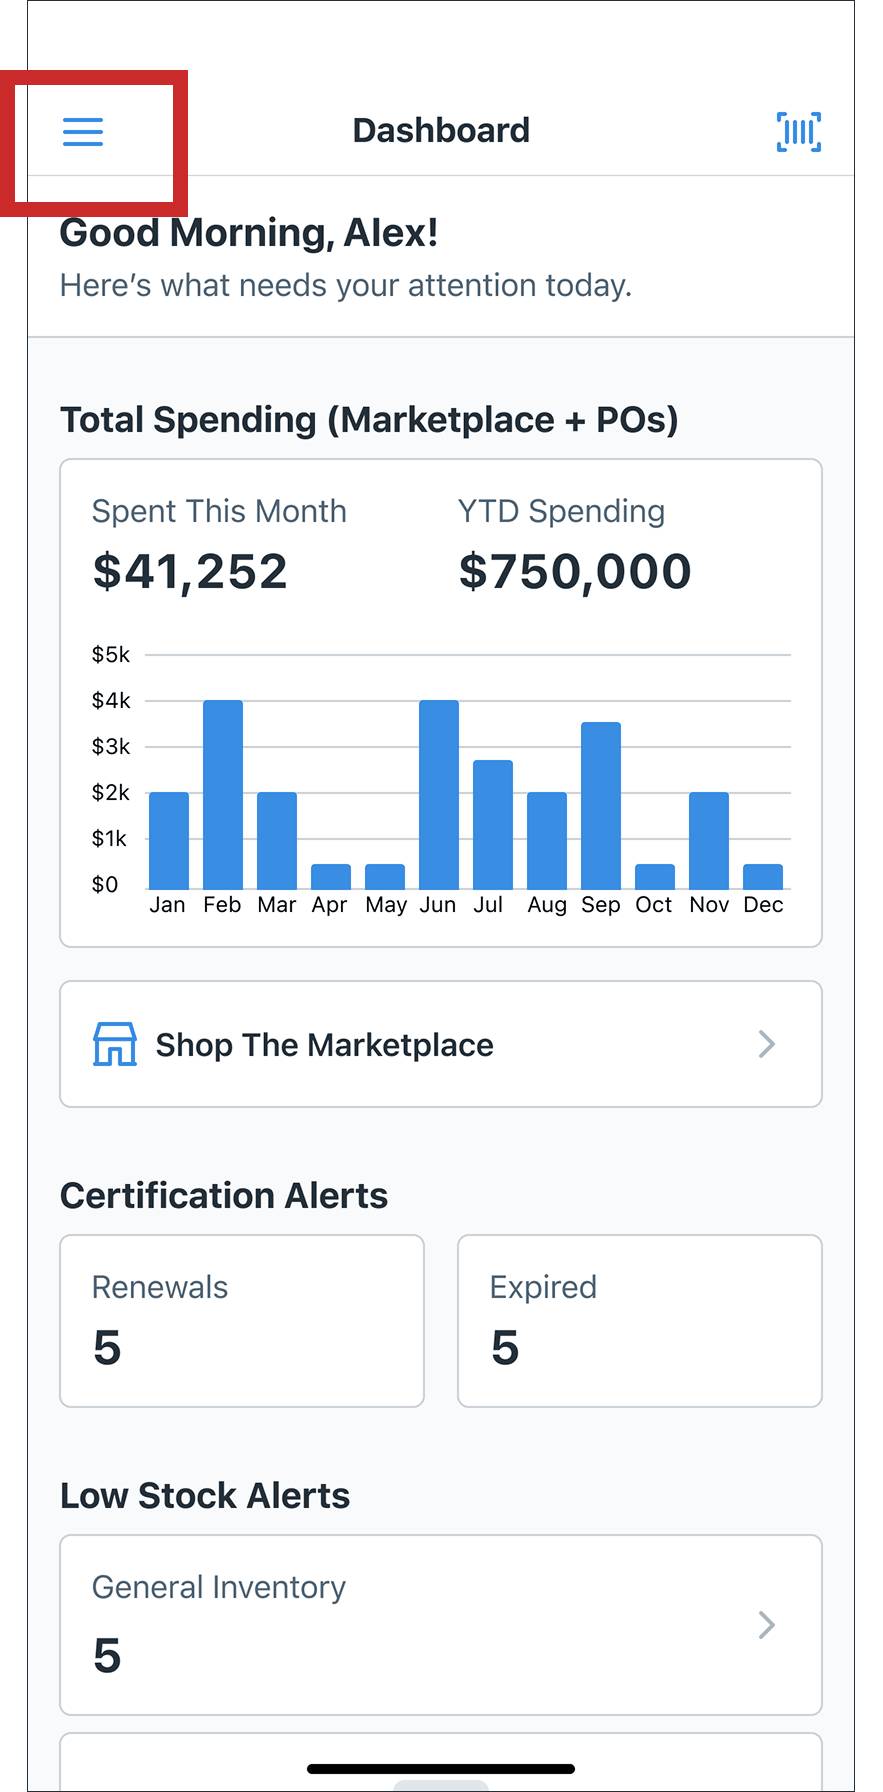
Once installed, login and tap on the Hamburger icon in the top left corner and a menu slideout should appear.
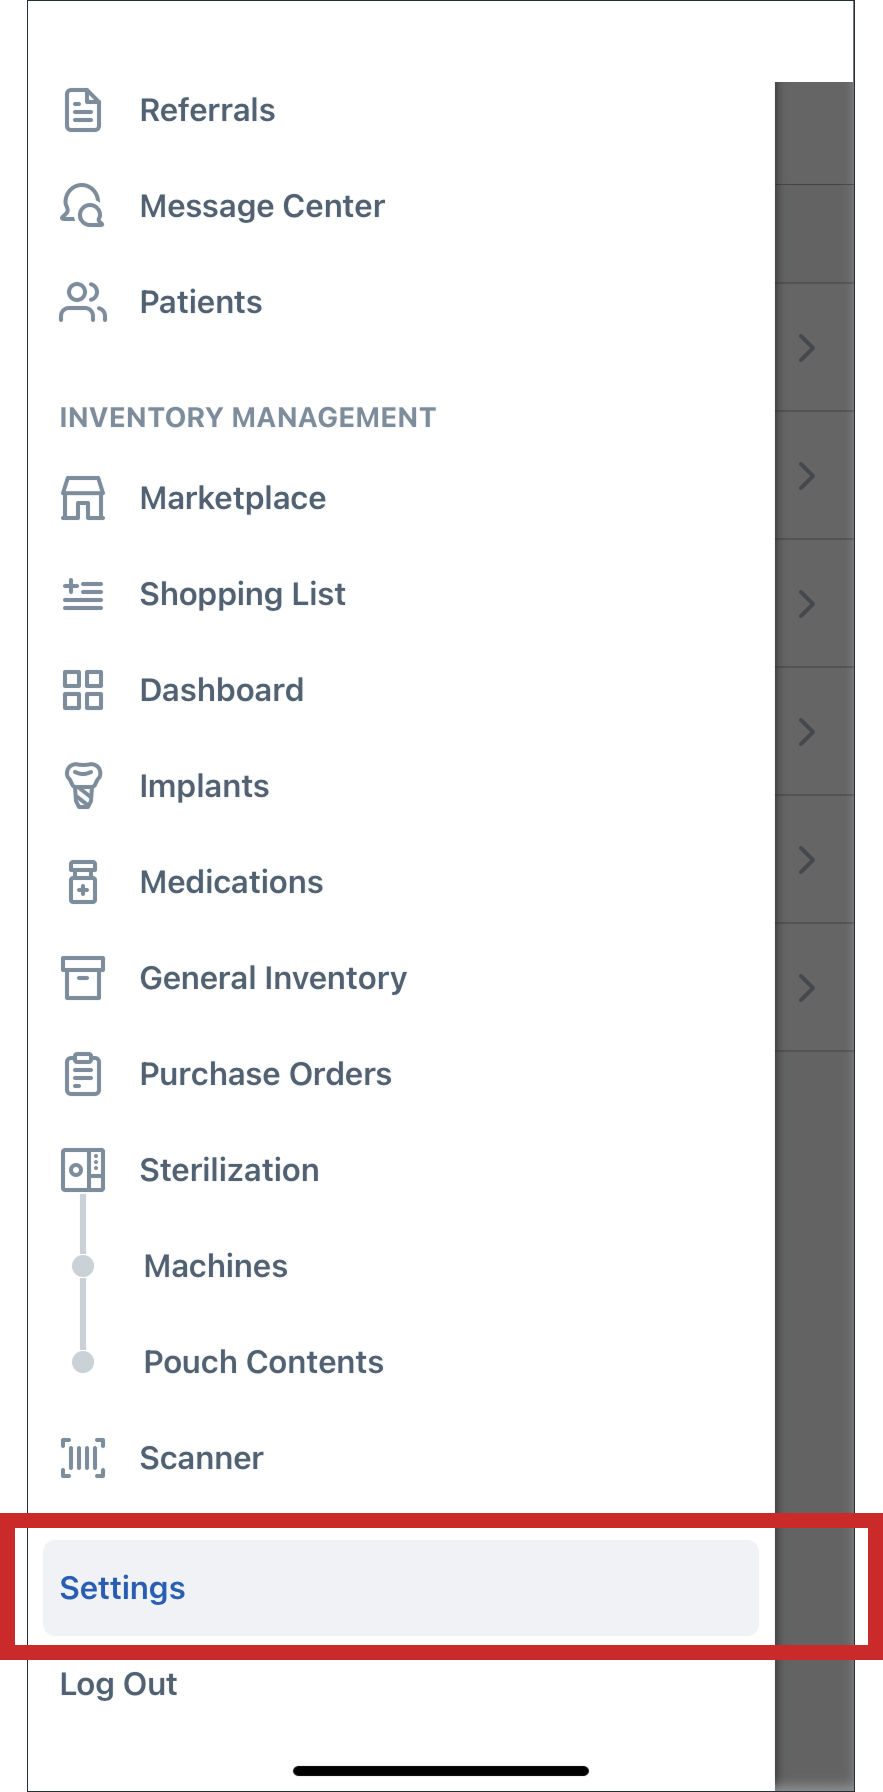
Towards the bottom of the screen, find and tap on Settings.
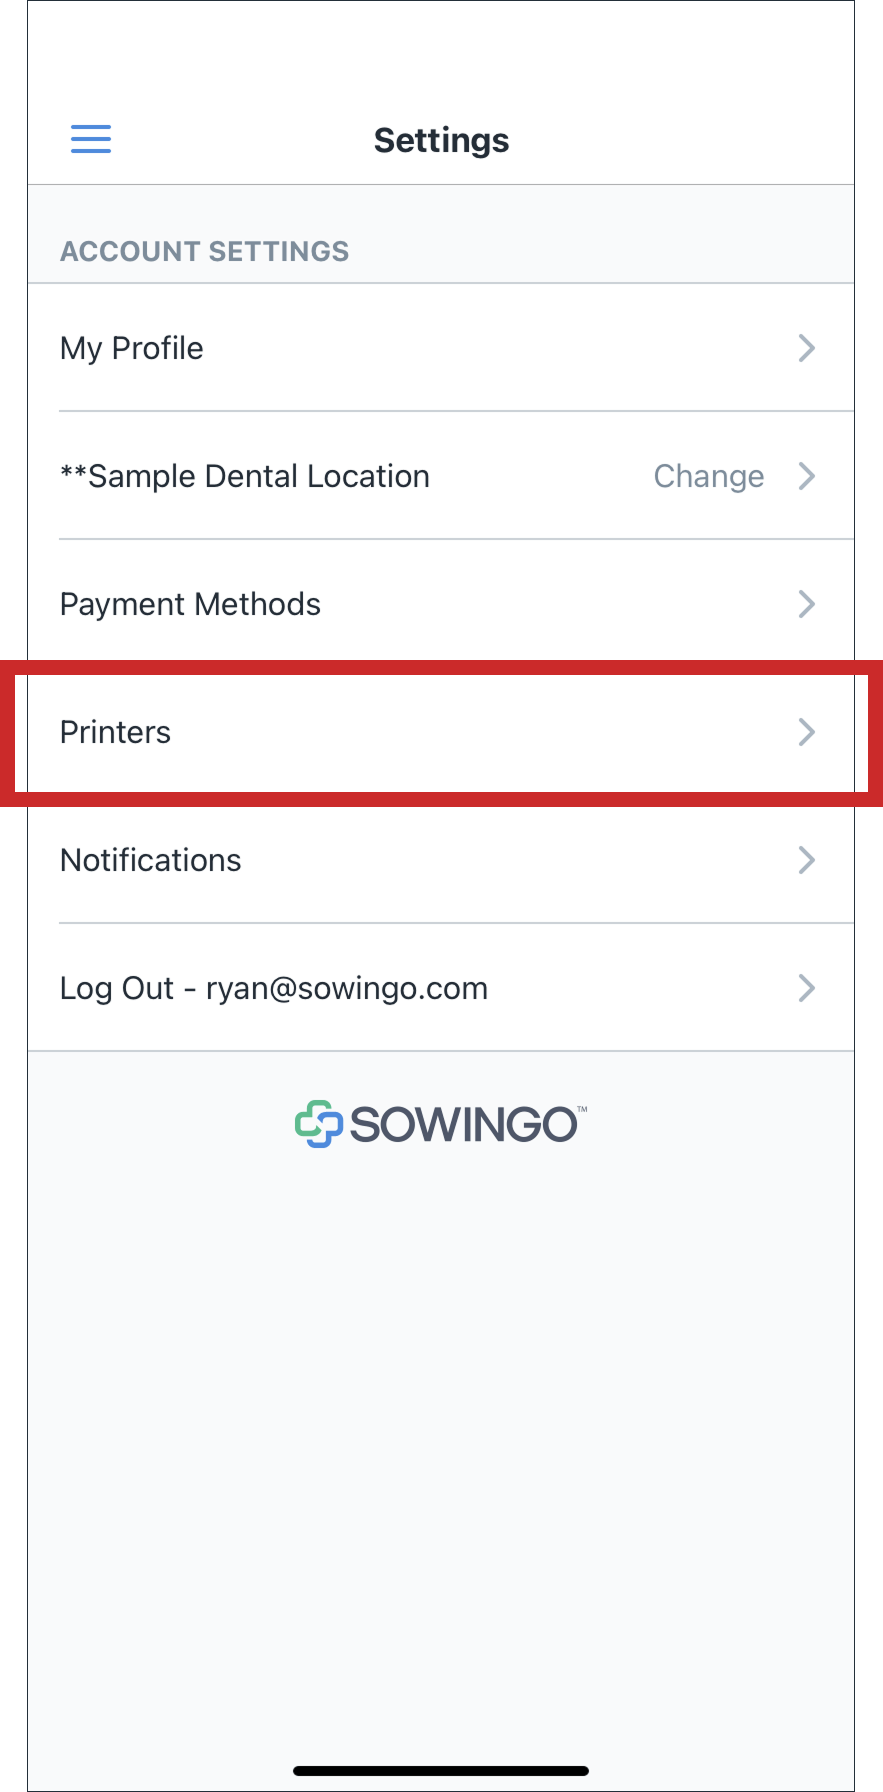
On the Settings screen, tap on Printers.
On the Printers screen, tap on Connect To Printer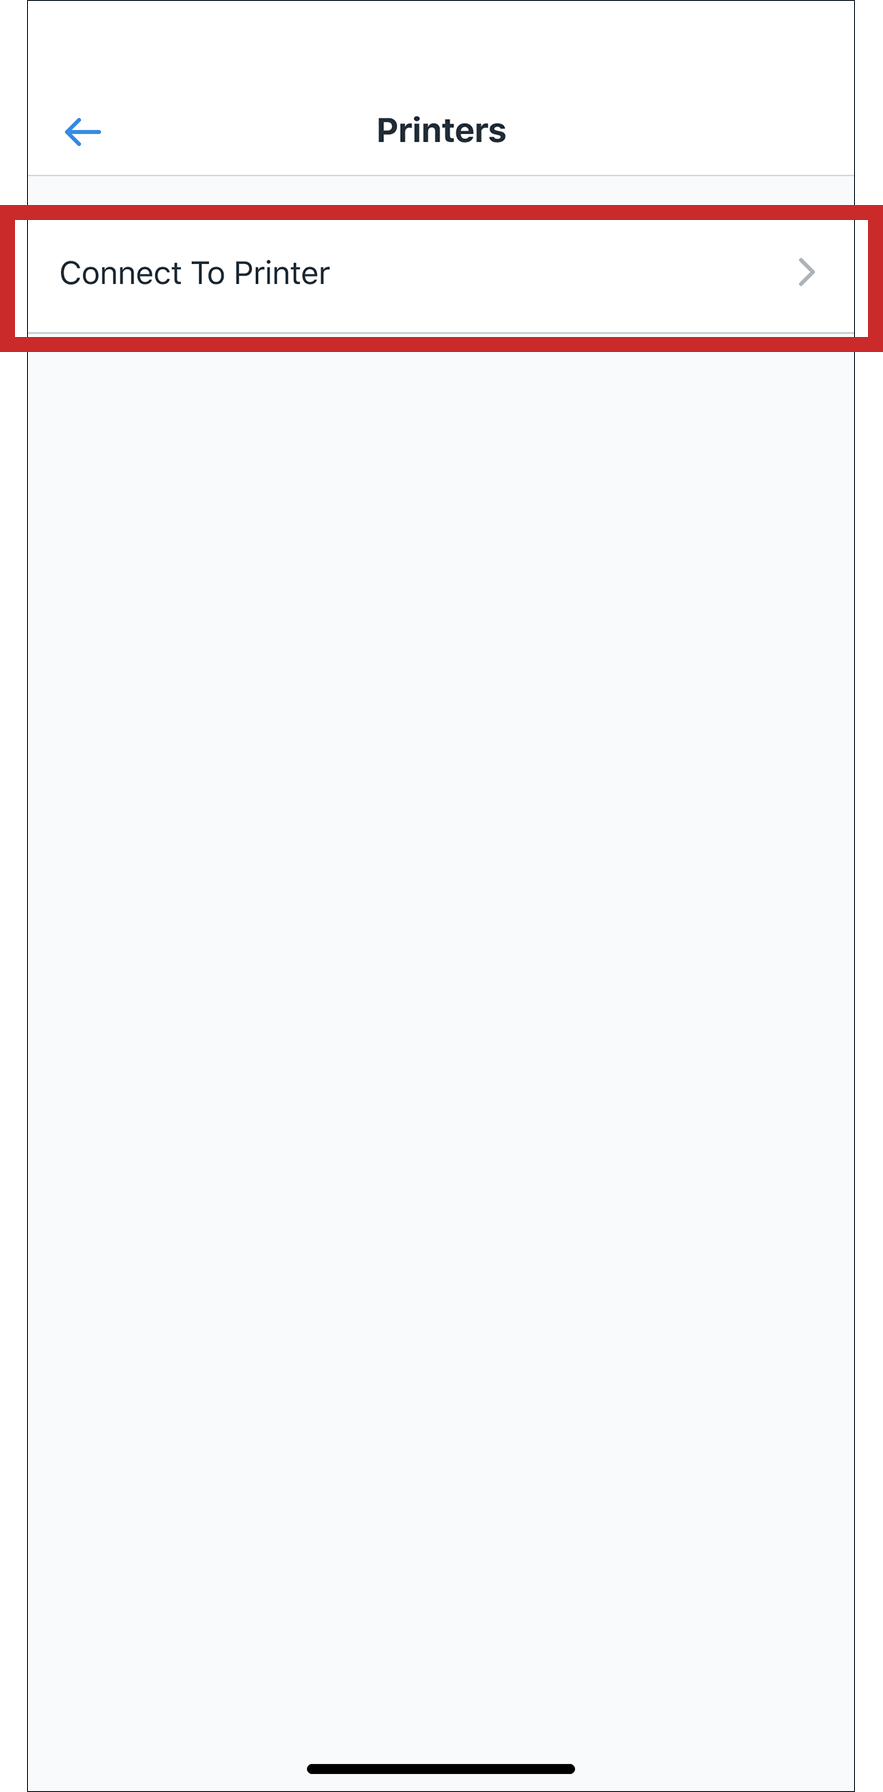
On the Available Printers screen, your Zebra printer should be visible. It will be the name of the printer and serial number. Tap on your Zebra printer to connect. If it doesn’t, please reach out to our support team.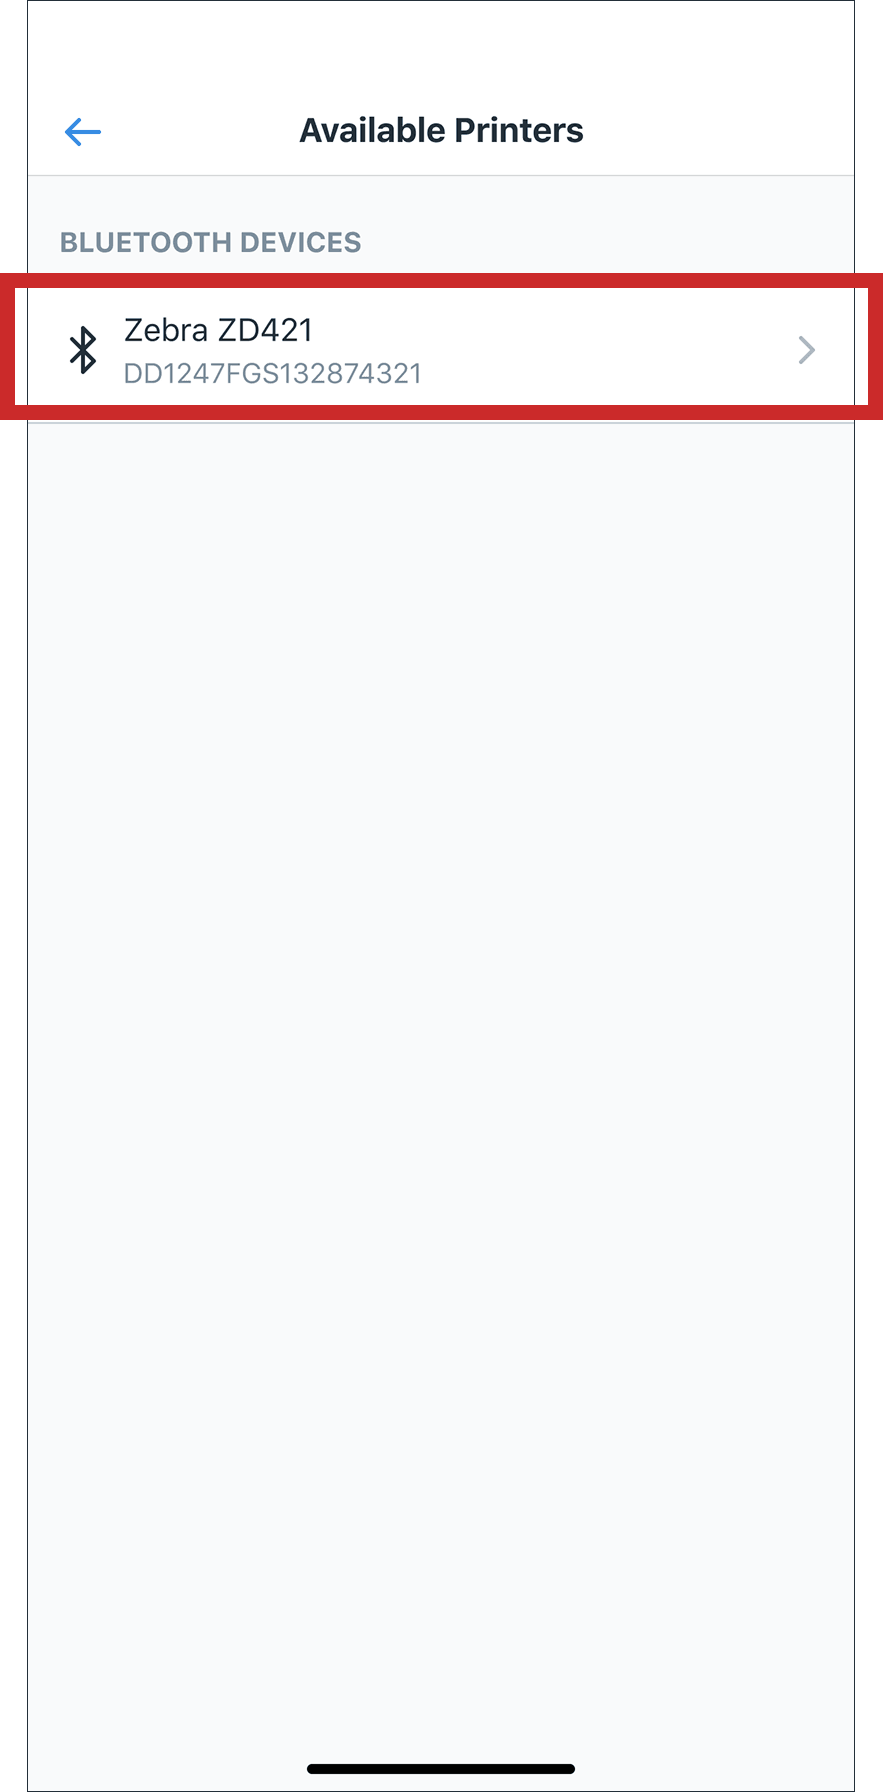
Once the Sowingo app has successfully connected to the printer, it will redirect you to the Printers screen with your Zebra printer listed under “Connected Printers”. Next, to connect to Wi-Fi, tap the “Connect To Wi-Fi” button.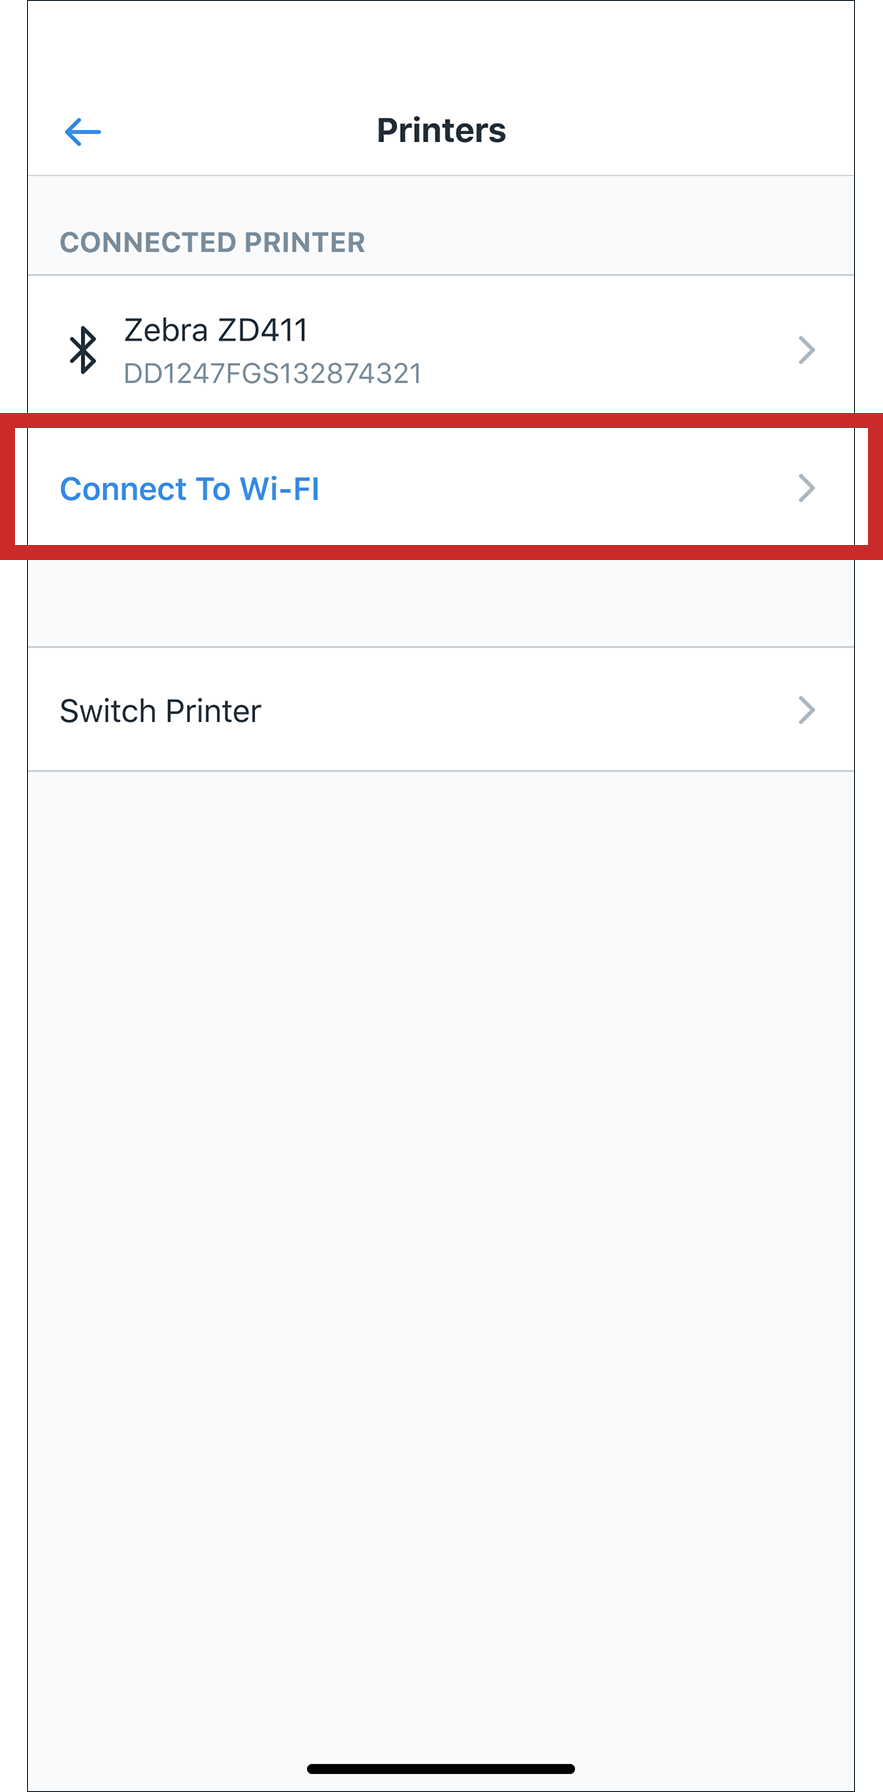
On the next screen, in order for the Sowingo app to connect to your Zebra printer via Wi-Fi, tap “Allow”.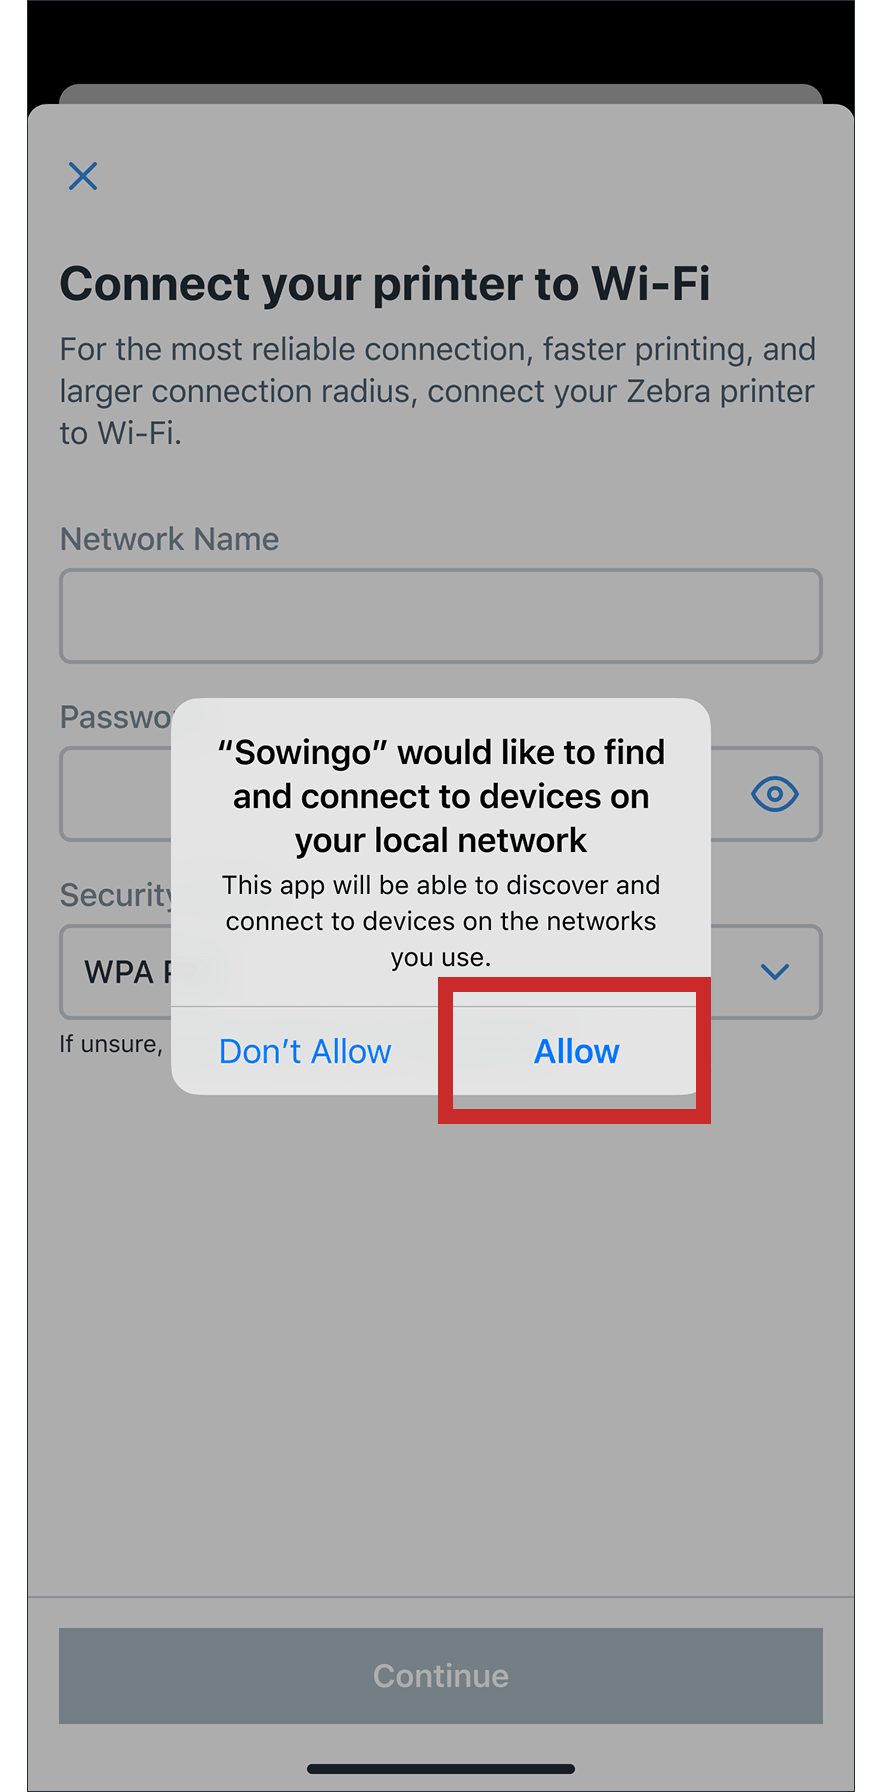
Enter the Network Name and Password of the Wi-Fi your device is currently connected to. Please be aware that it is case sensitive.
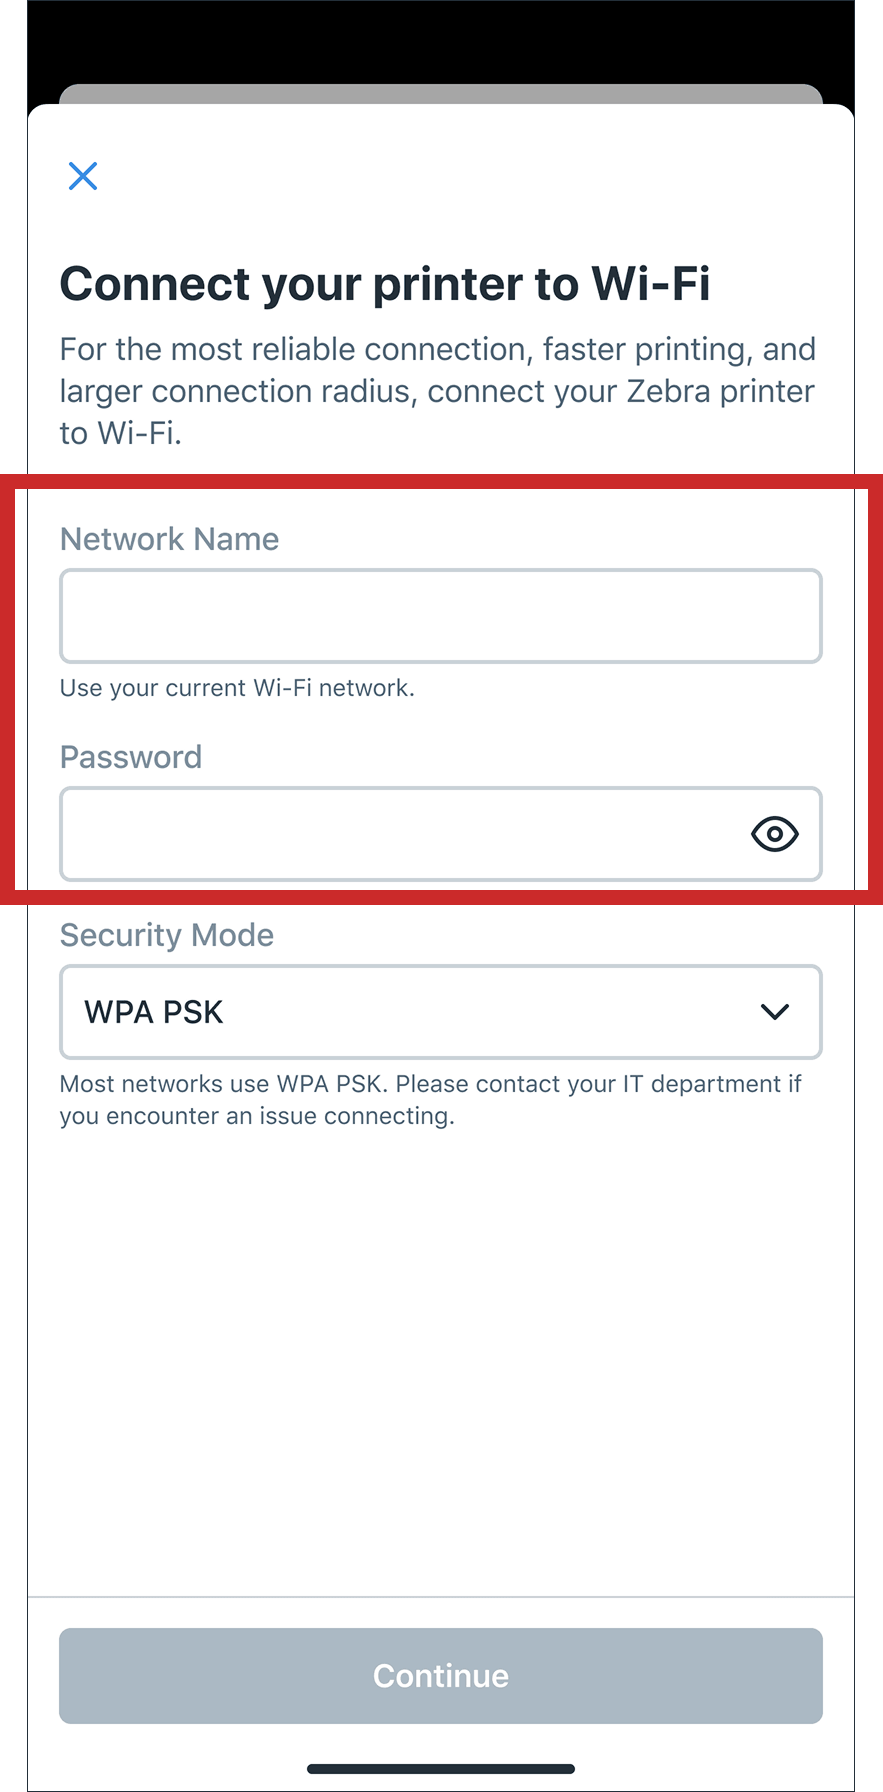
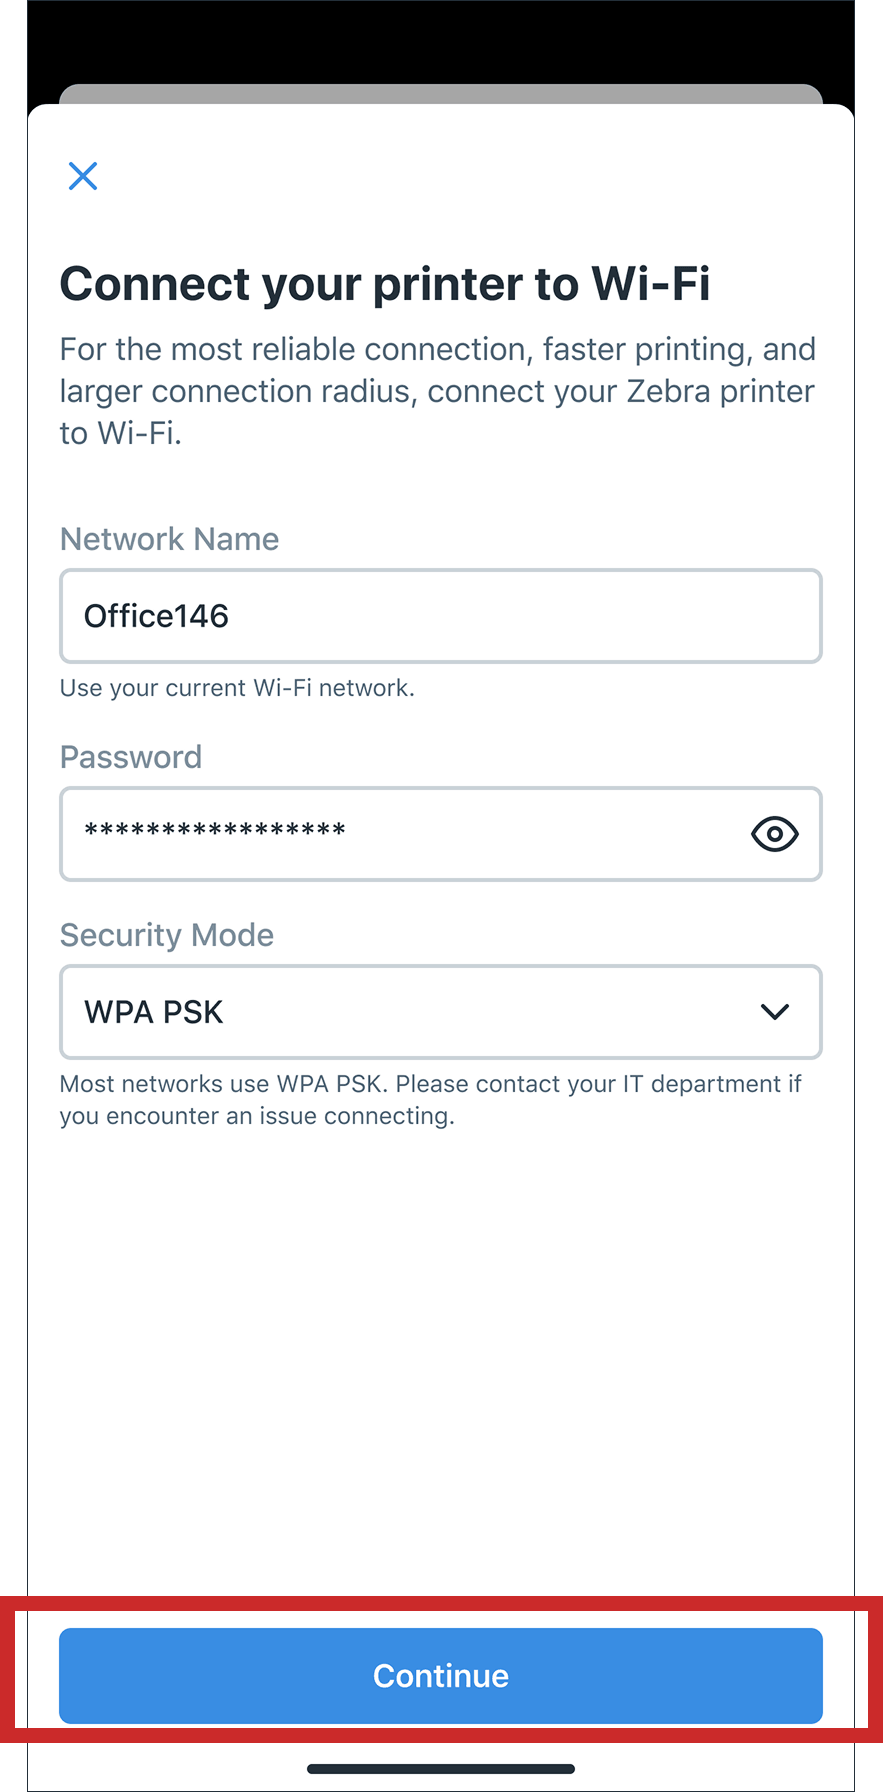
Once you’ve filled in your Wi-Fi details, tap Continue.
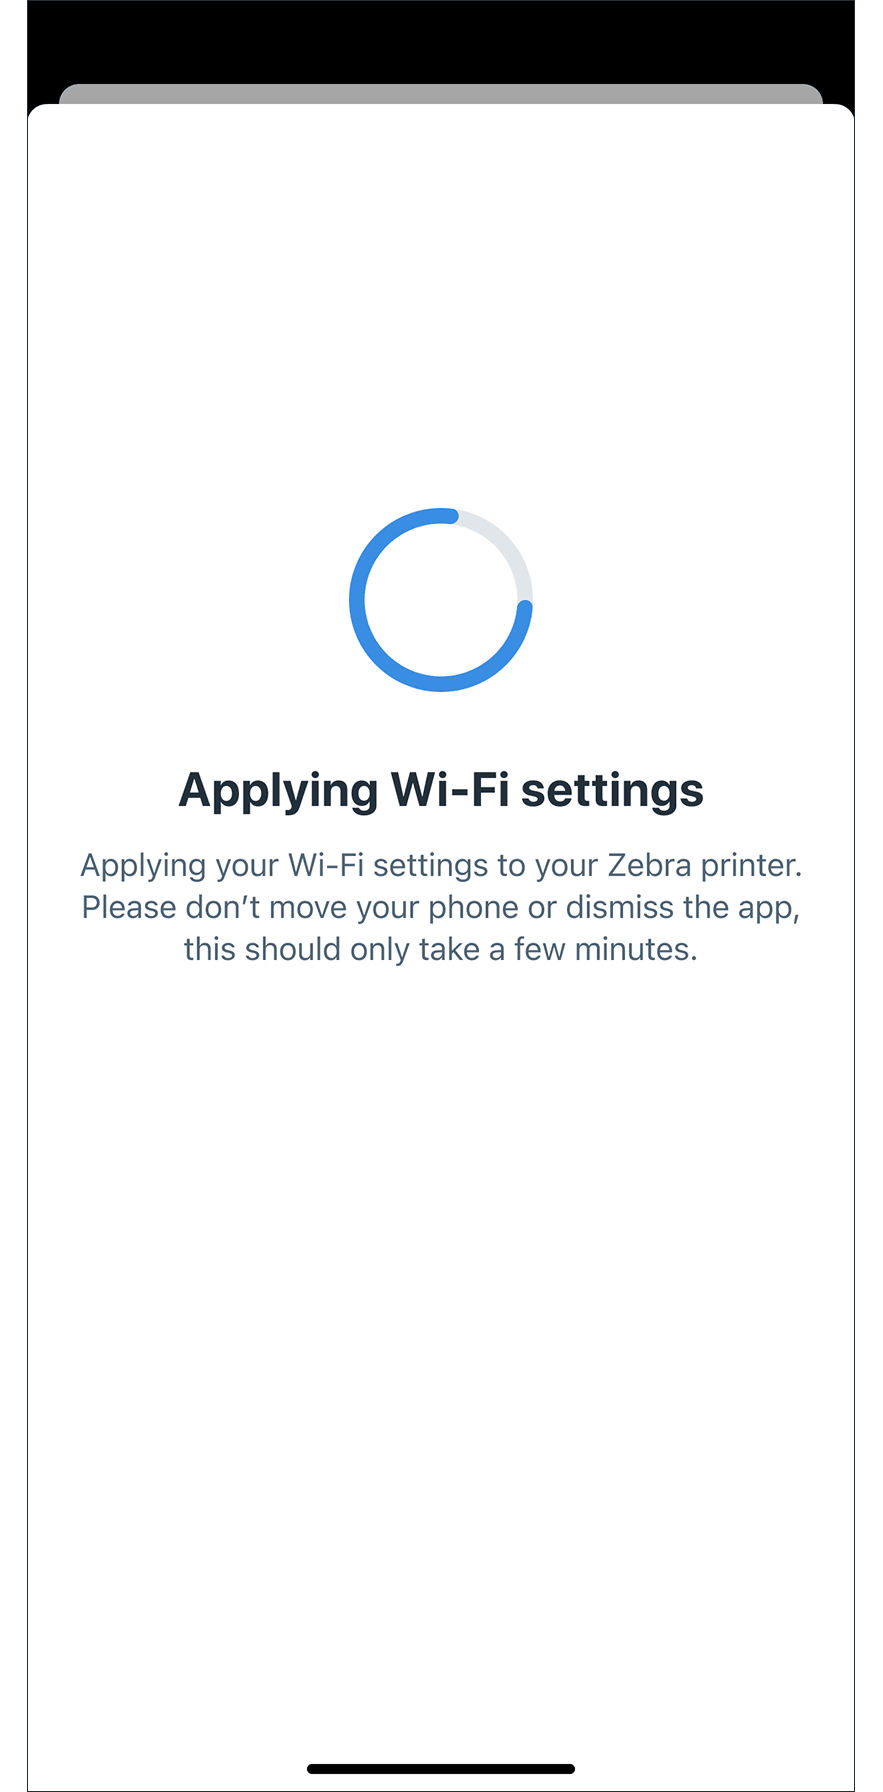
Your Wi-Fi settings will begin applying to your Zebra printer.
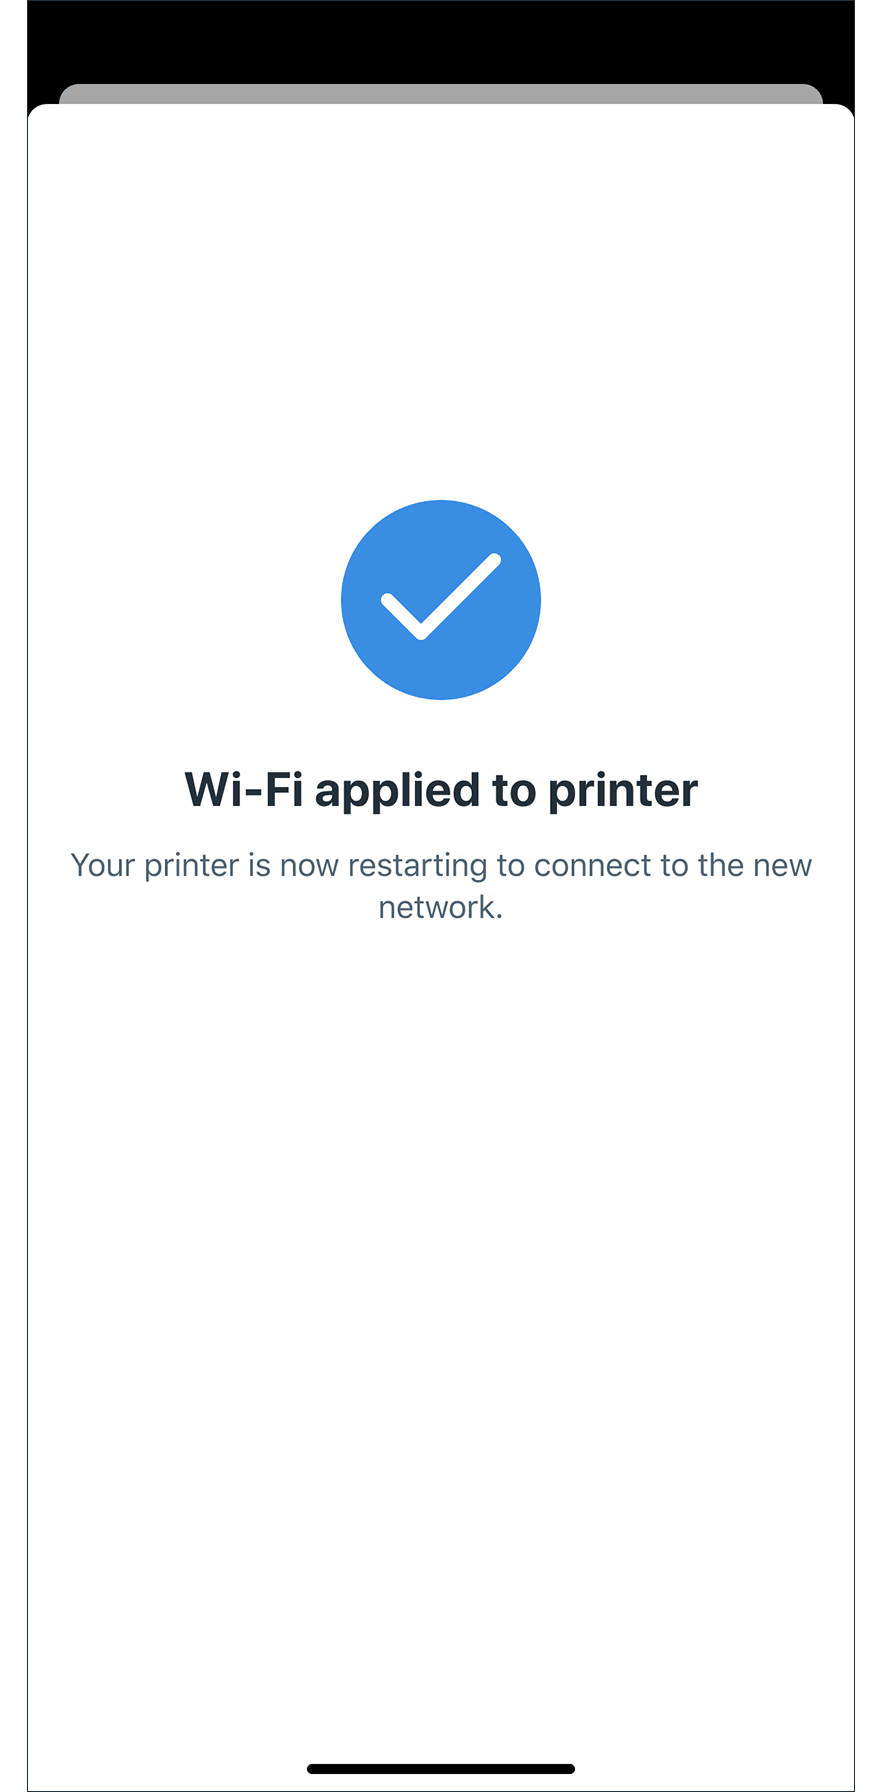
Once your Wi-Fi has been successfully applied, you’ll see this success screen. It will then transition to a new screen where your printer is restarting to confirm those settings.
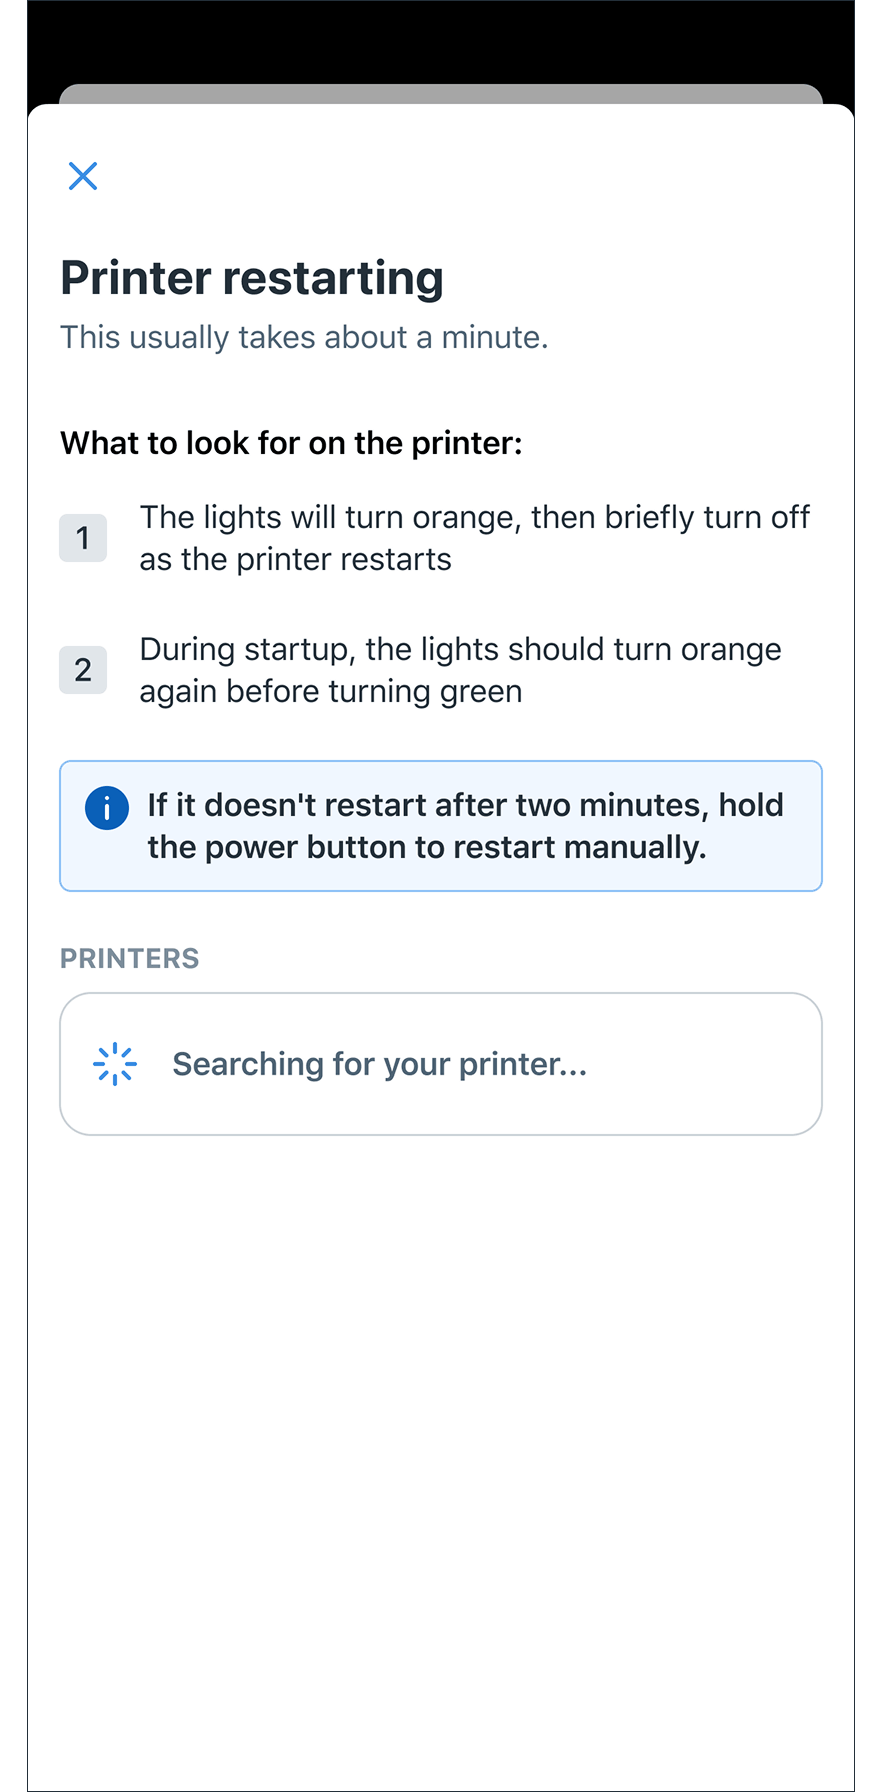
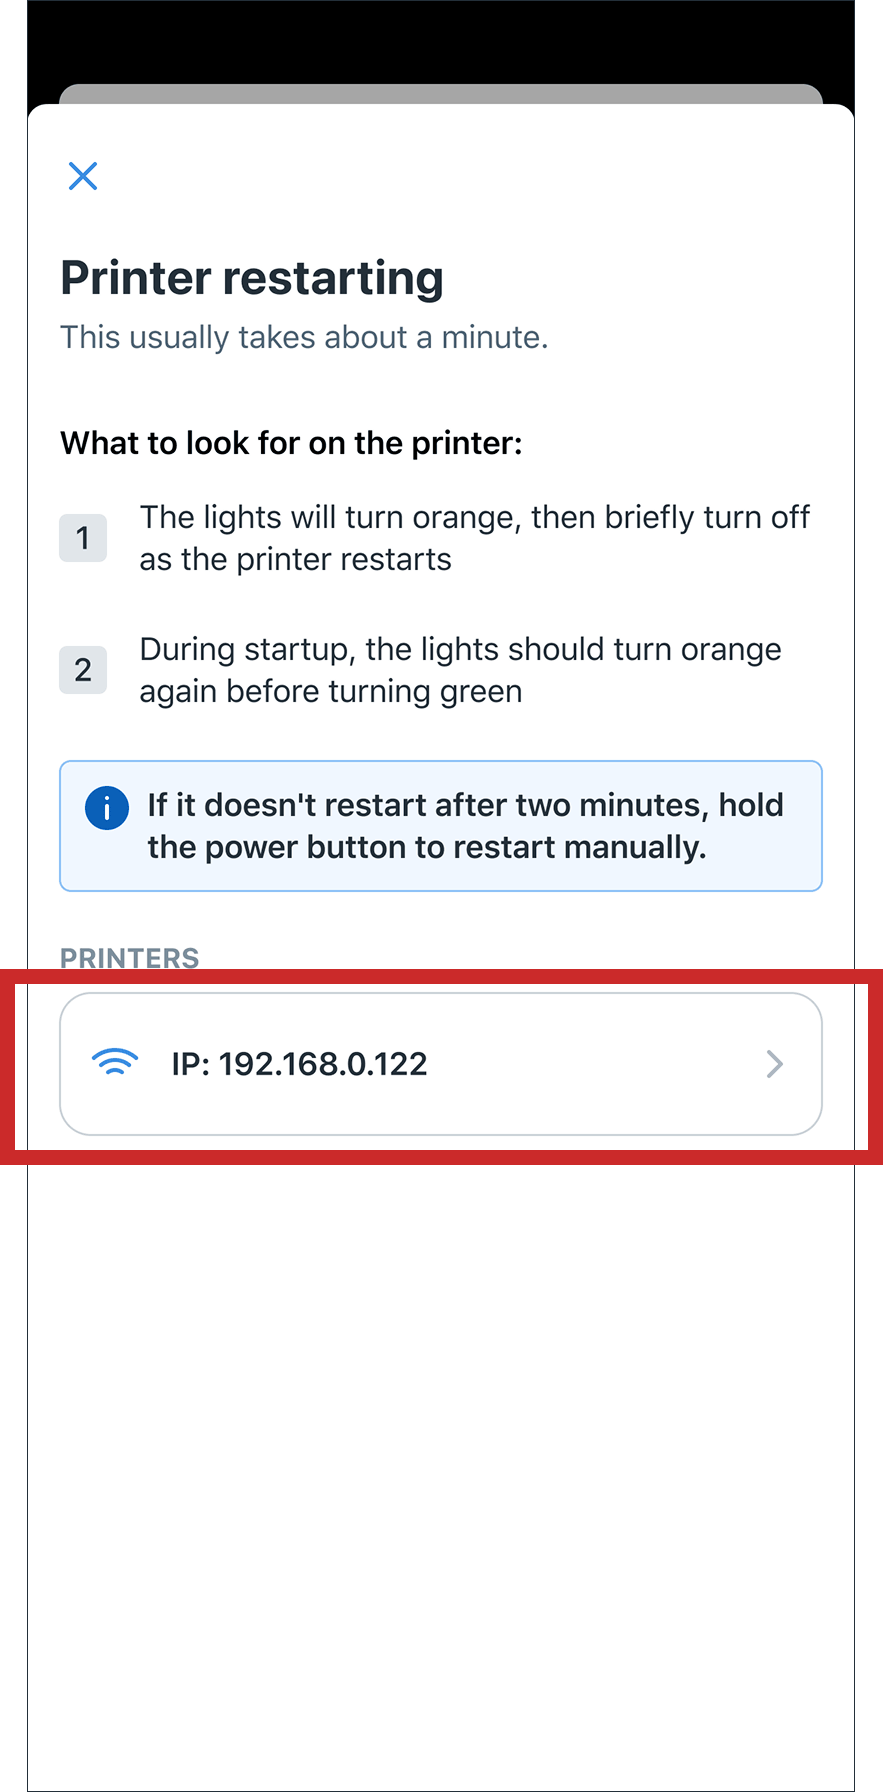
Once your printer has finished restarting, your Zebra printer will become available. Tap on your Zebra printer to connect to Wi-Fi.
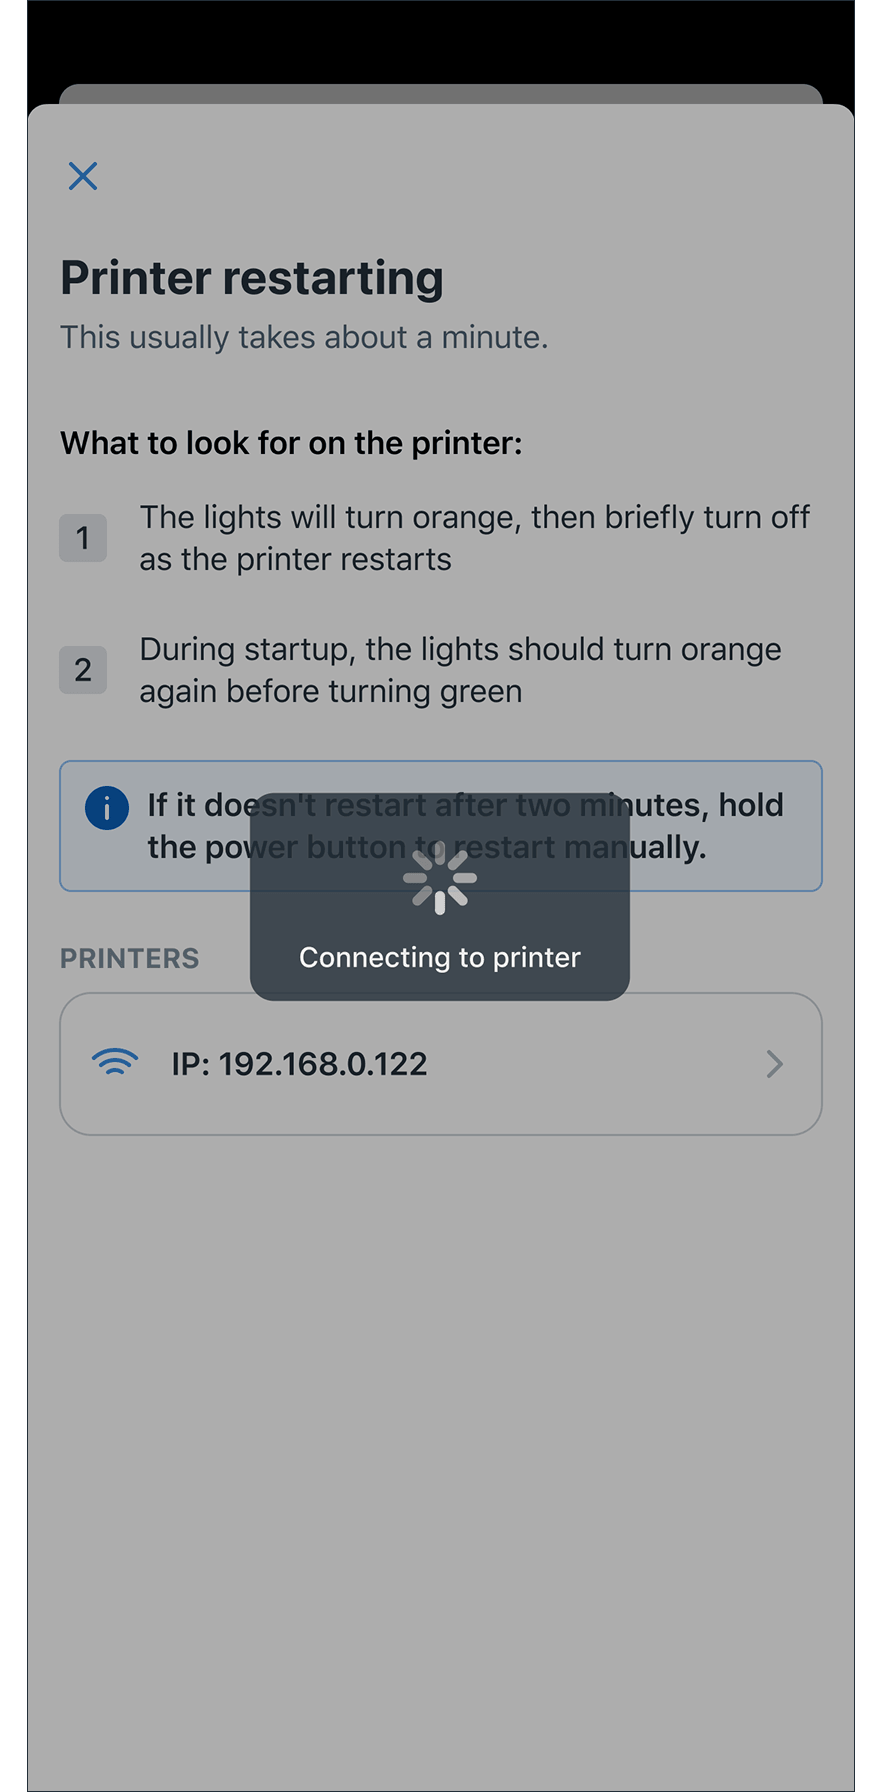
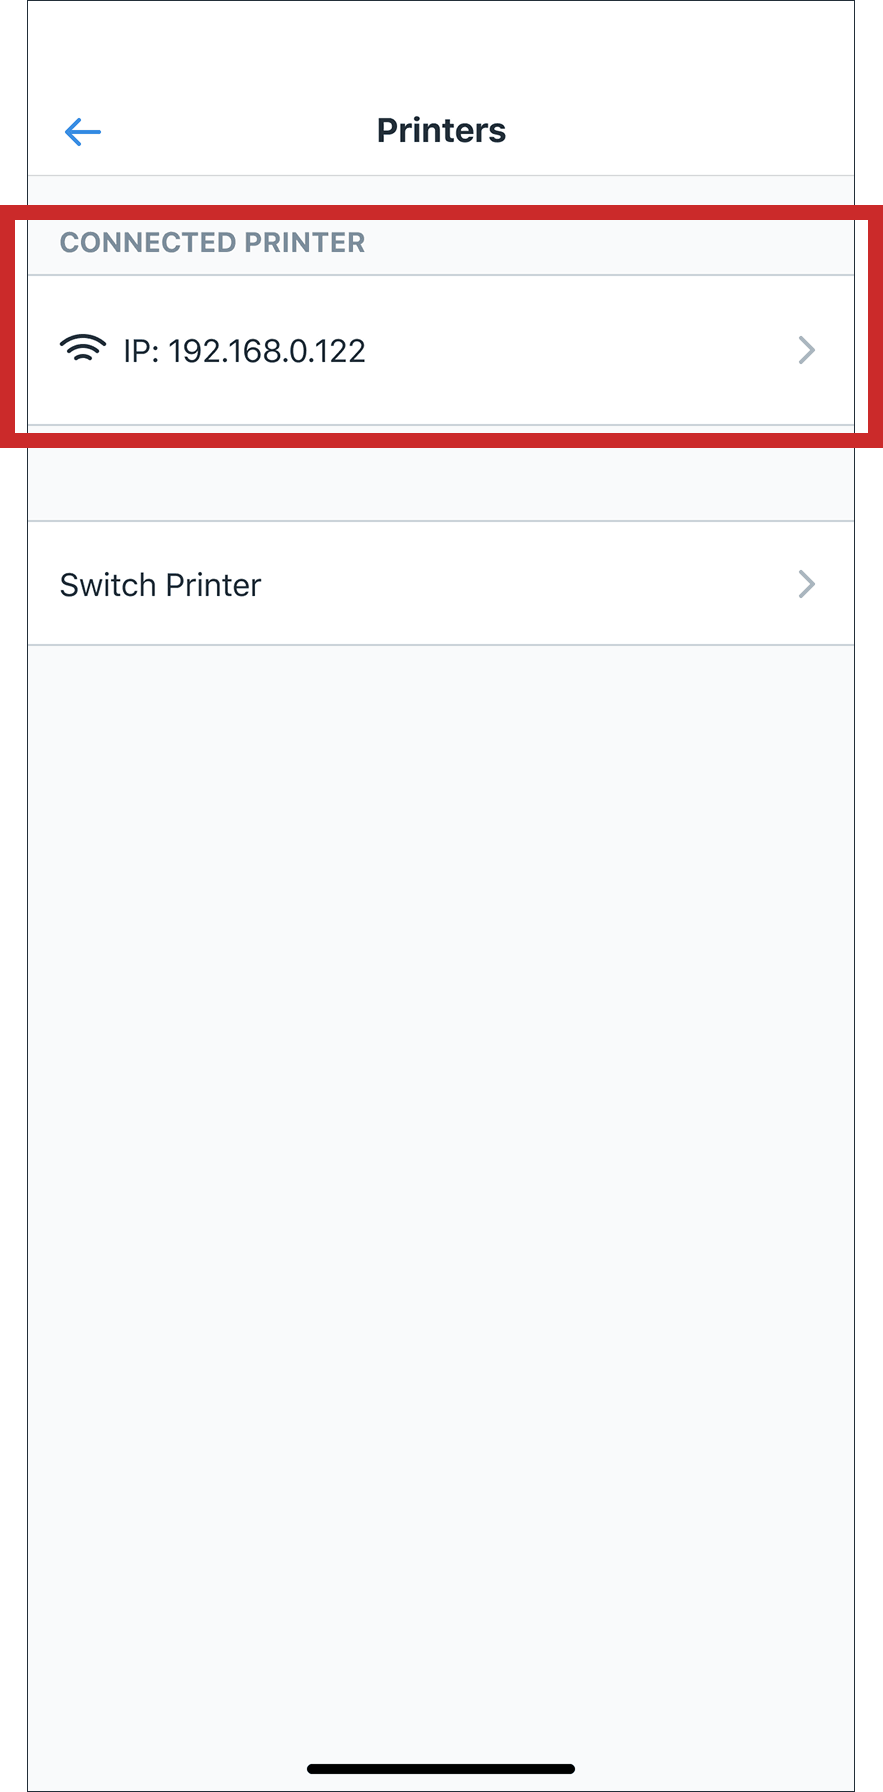
The Sowingo app will now connect to your Zebra printer. Once it has successfully connected, it will return you to the Printers screen with the printer applied. It’s now ready to begin printing.
Step 7: Check the Printer Settings
- On the Printers screen, tap on your Zebra Printer.
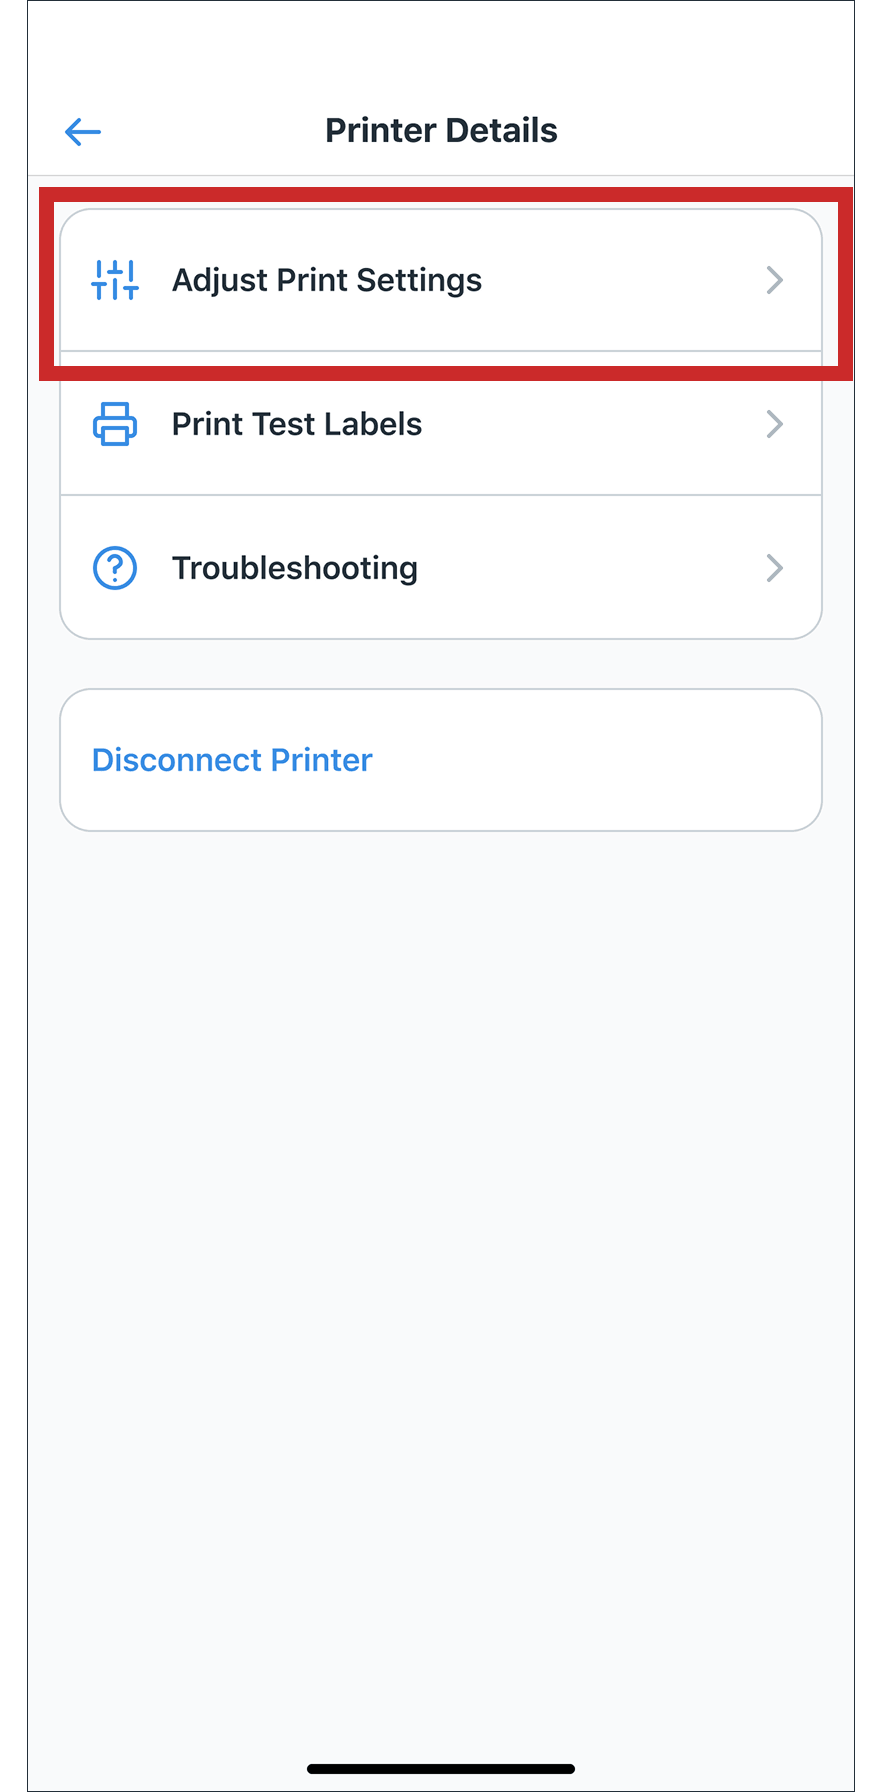
- Then tap on Adjust Print Settings.
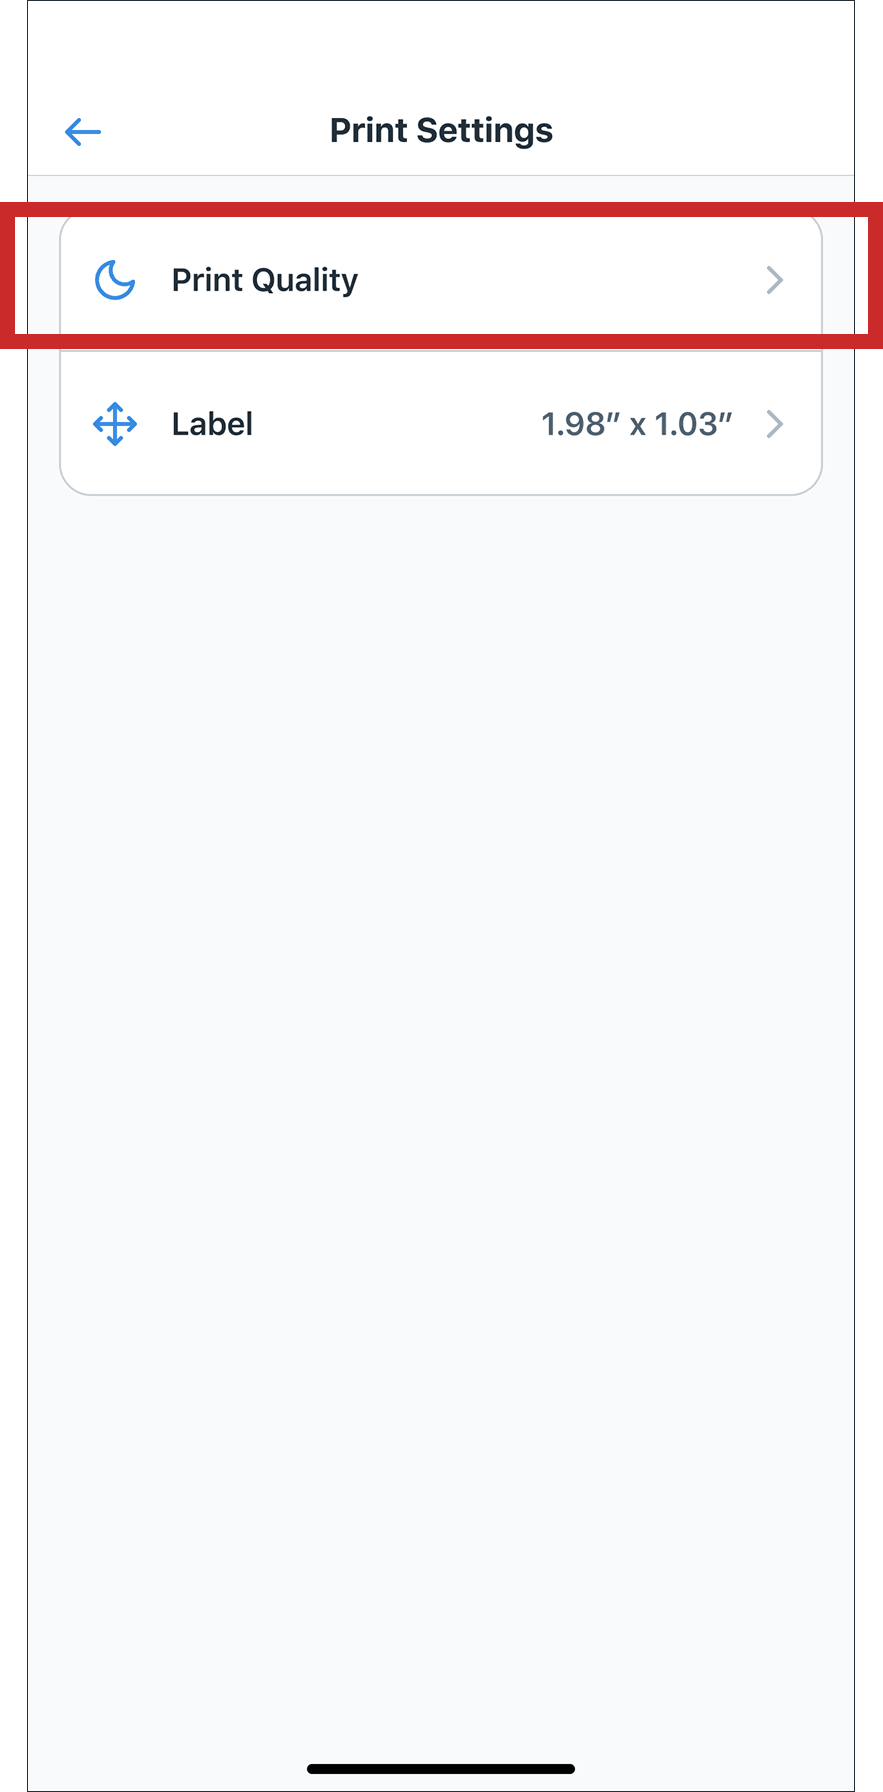
- On the Print Settings screen, tap on Print Quality.
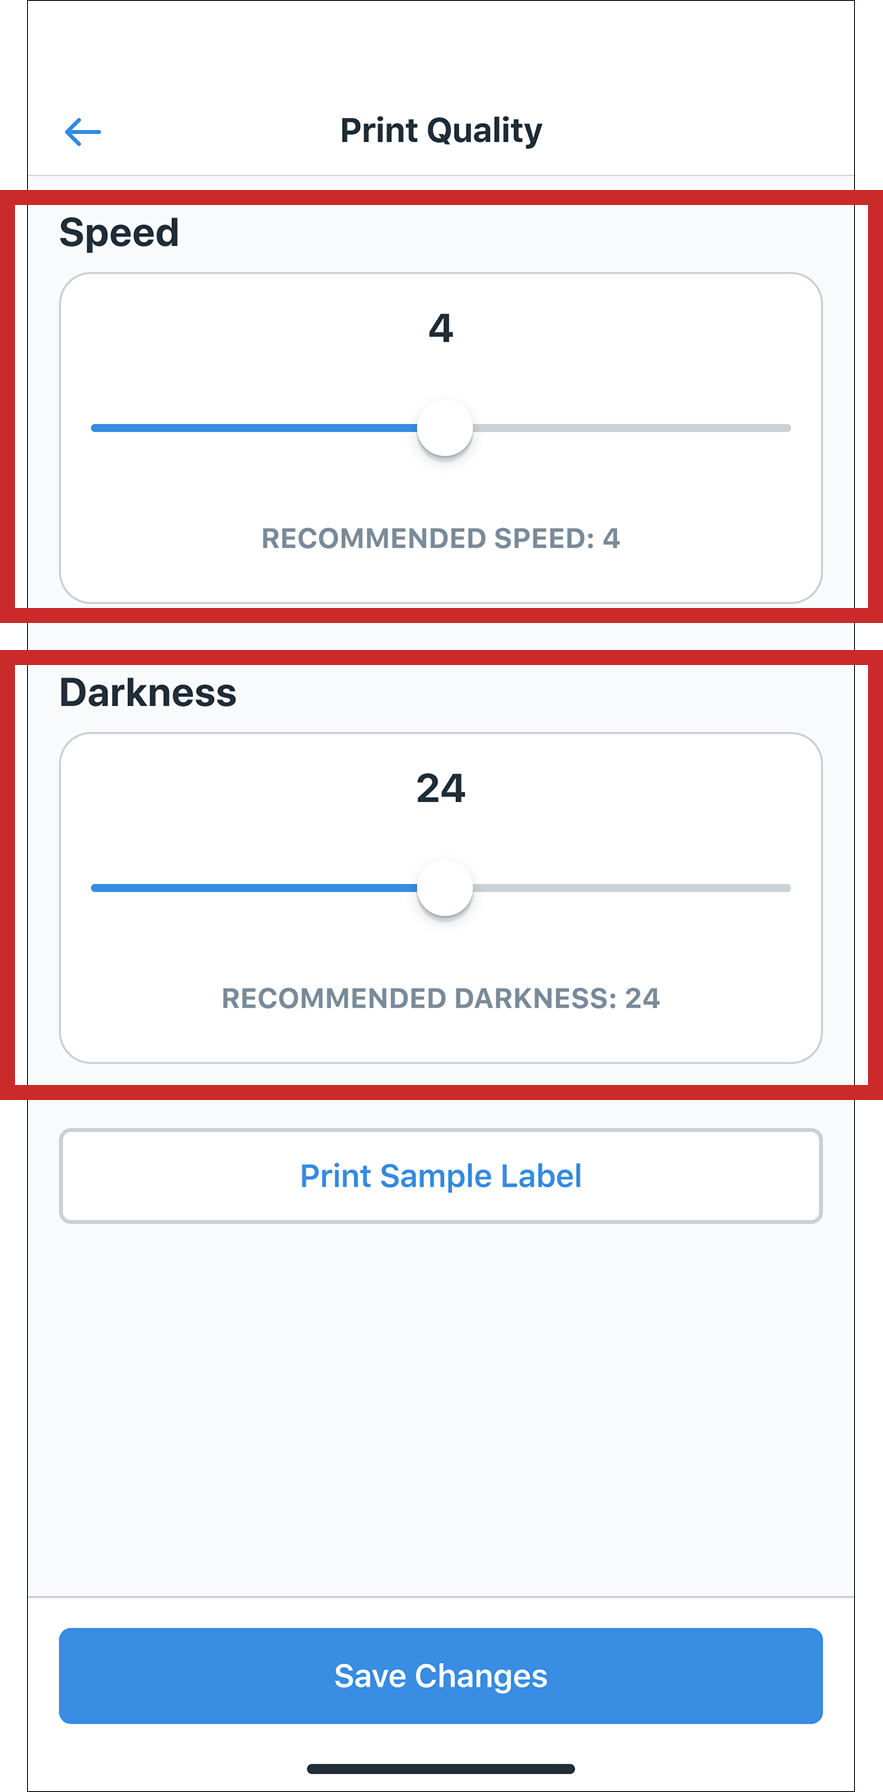
- On the Print Quality screen, ensure the Speed is set to 4, and the Darkness is set to 24. If it’s not, please adjust both settings to match.
- Once you’re done updating the Speed and Darkness, tap the Print Sample Label button.
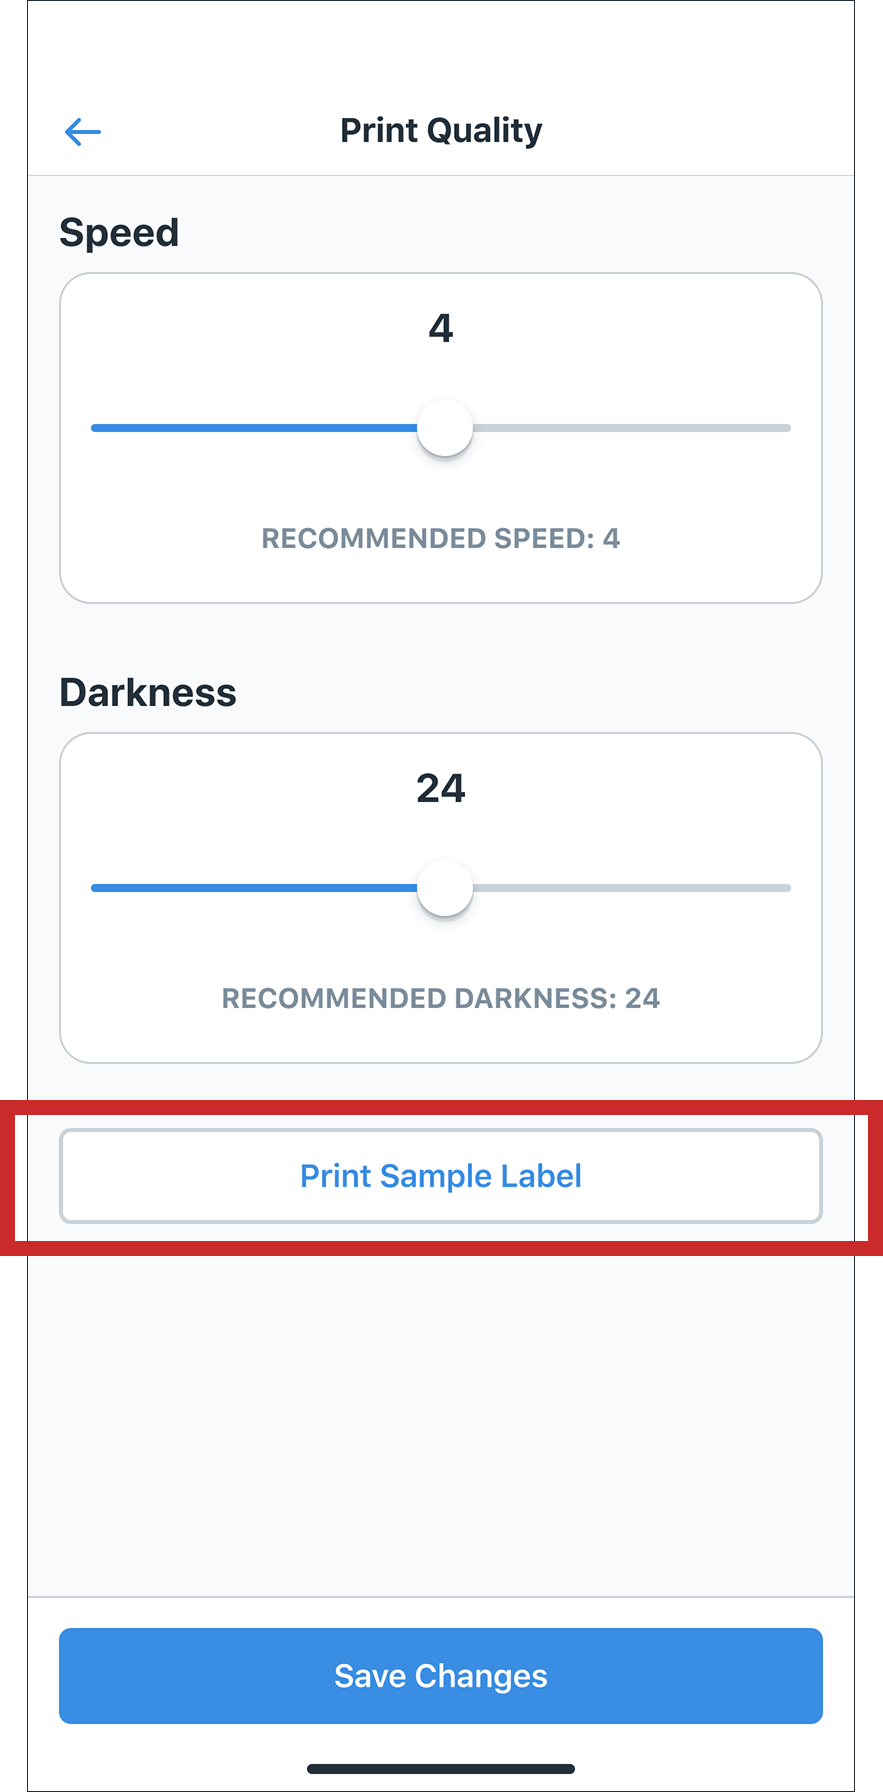
- Once the sample label has printed, use your barcode scanner to test whether it can be read. If the label looks too light and the scanner has a difficult time scanning, adjust the darkness setting. When the barcode scanner can scan the barcode without any issues, tap Save Changes.
Step 8: Adjust the label size
- Now, go back to the Printer Settings screen and tap on Label.
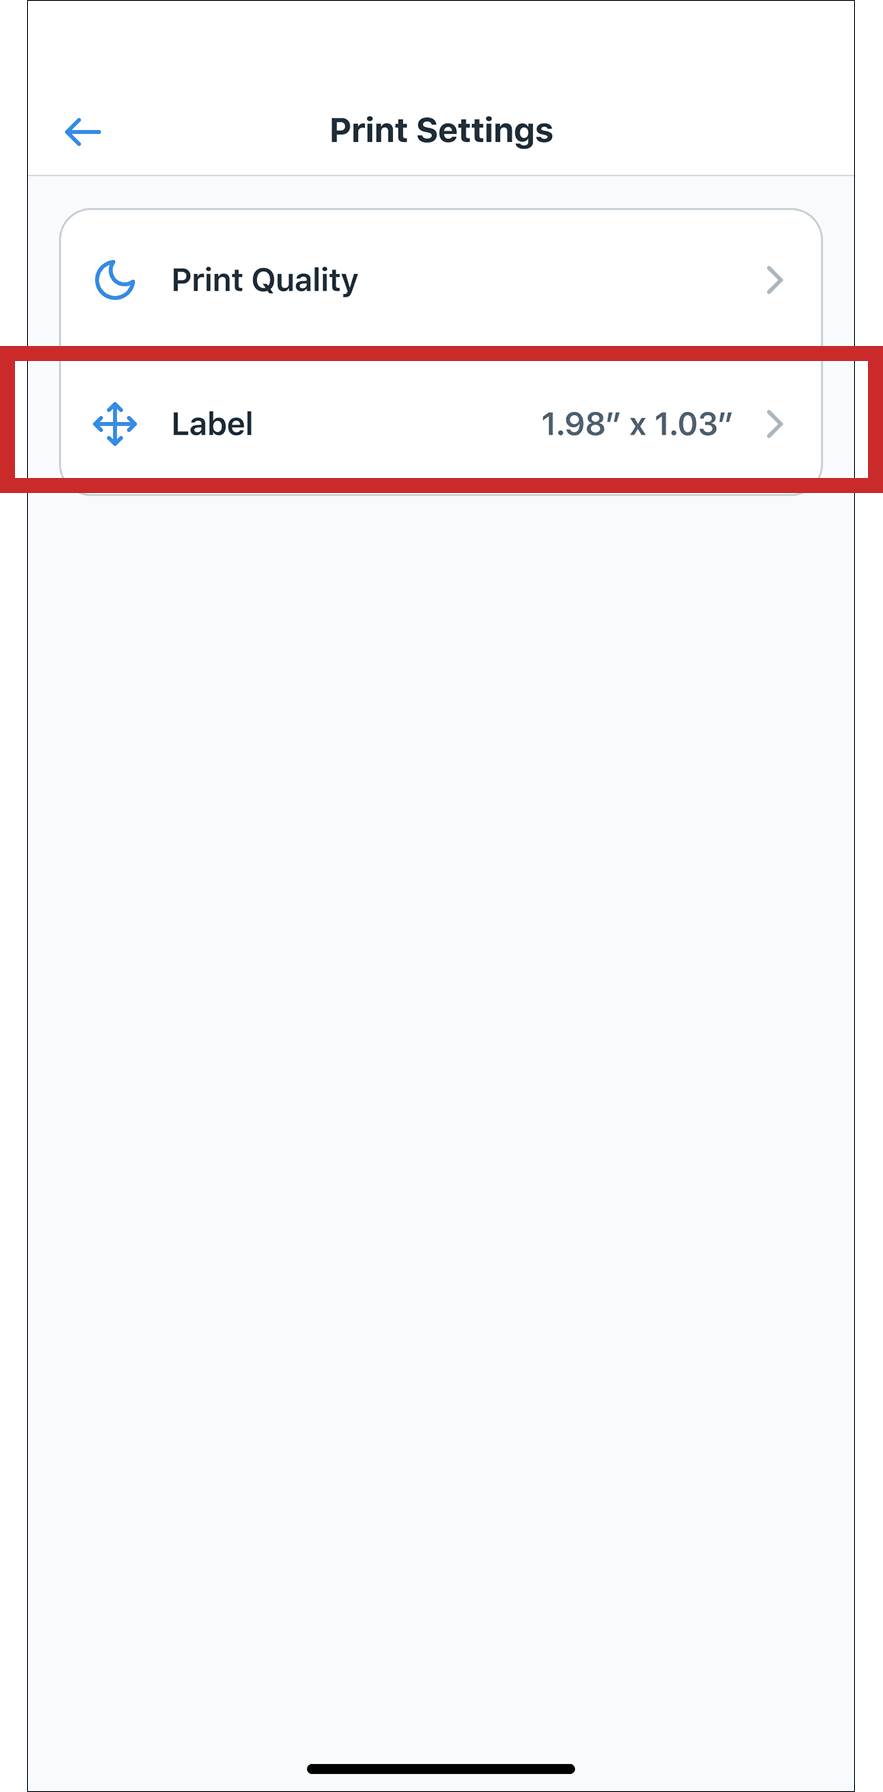
- Verify that the label width is set to 1.98″ and the height is 1.03″.
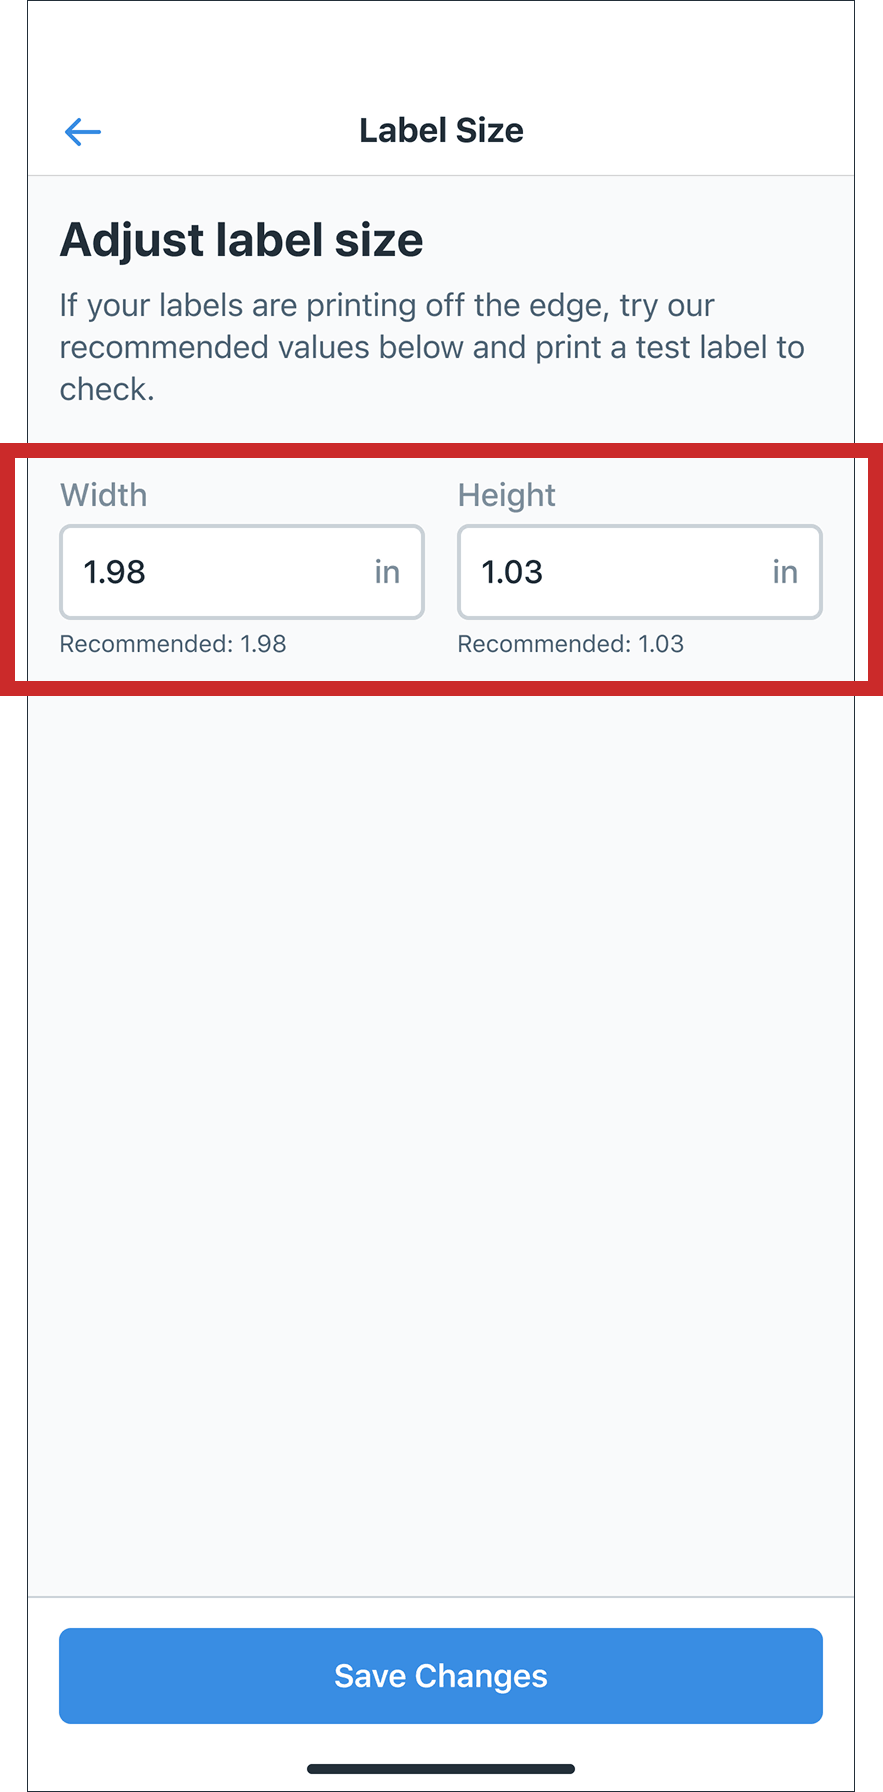
- If the label width and height are not set to the above sizes, please adjust it and tap Save Changes to save.
- The Zebra printer is all setup!
Step 9: Unbox and setup scanners
- Please ensure each scanner has a bluetooth USB stick, a charging cable, and the scanner unit.
- For best results, please plug in and fully charge your scanner before use.
- Once the scanner has been fully charged, remove the bluetooth USB stick and insert it into the operatory computer of your choice. This scanner will only work with the included USB stick. Please ensure the scanner stays in close proximity to the USB stick for it to work properly.
- Press the scanner trigger to turn on. You should see lights and hear a sound coming from the unit. This means it’s ready to be used.
- To scan pouches or instruments into the patient chart, simply open up an editable document and scan each QR code. All corresponding information will now appear in the patient’s document.
Software for Desktop
2. Download the Zebra Browser Print app
Mac download: Mac Download.dmg
Windows download: Windows Download.exe
3. Install the Zebra Browser Print app
- Open the Browser Print app.
- Read and accept the End User License Agreement and click I Agree.
- Continue through the rest of the setup.
4. Configure the Zebra Browser Print
- Open the Browser Print app.
- Once the Browser Print app is opened, there will be a zebra icon that will appear in the upper bar where the date & time is located (on a Mac), or in the bottom right corner (on Windows). Click on the Zebra Icon, then click Settings to open the Browser Print Settings window.
- Under Default Devices, if your printer is not already appearing, click Change to switch it to your Zebra printer.
- Select the printer with the model number and IP Address (i.e. – ZD4210-203dpi – 192.168.2.100). If it doesn’t show up, it can be manually added
- Log into Sowingo.
- Go to the Sterilization Module on the left side menu.
- Click Add Test, then Sterilizer/Chemical, and click Continue. Now, a pop up will appear from your Browser Print Settings confirming the connection to app.sowingo.com. Click Yes on the pop up. Now app.sowingo.com should show up under Accepted Hosts in the Browser Print Settings – this will allow you to print.
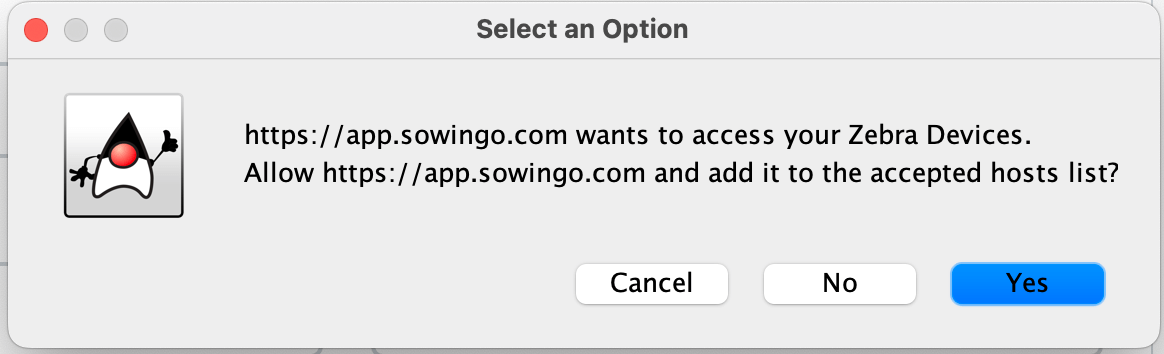
- If you haven’t already, add pouches in the Pouch Contents tab. Then, go to an existing test, or create a new test, and add pouches to that test. Once that has been done, the Print Labels button will appear.
- Click on the Print Labels button and it will display the labels to print.
- Once you’re happy with the labels, click Print Labels.